- Top >
You want to allow people who do not have a Box account to upload files
Please select your preferred method.
Attach files to an email to upload
-
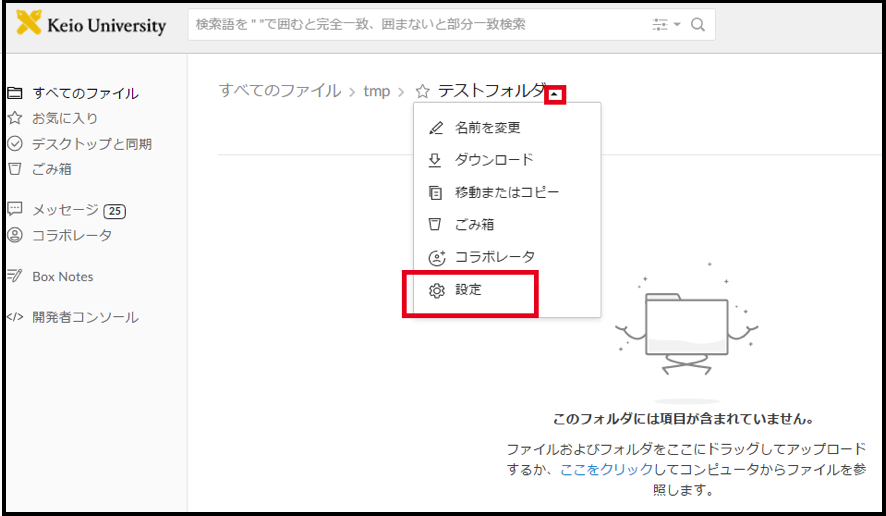
Select or create the upload destination folder (here, called "テストフォルダ (Test Folder)").
-
Enter the folder and click "設定 (Settings)".
-
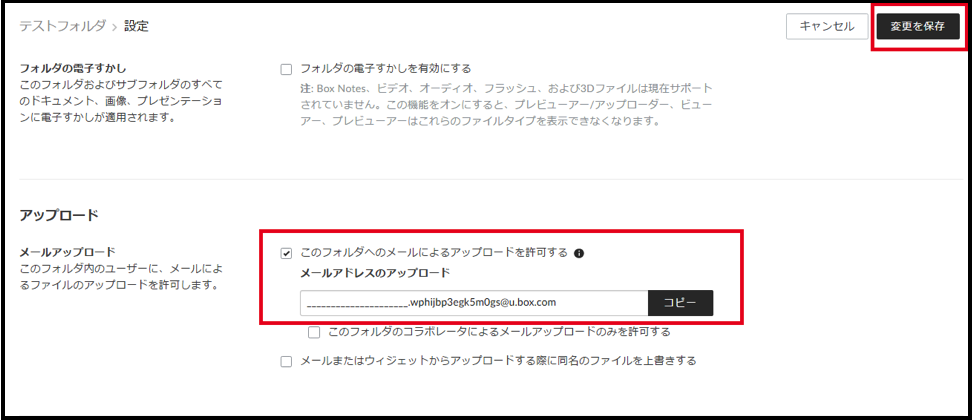
Check the item "このフォルダへのメールによるアップロードを許可する (Allow uploads to this folder via email)" in the "設定 (Settings)".
Copy the displayed e-mail address (ex: ____________ ****@u.box.com) and click "変更を保存 (Save Changes)" in the upper right corner.
The setting is completed.
After that, attach files and send it to this mail address, the file will be uploaded into that folder.You do not need to enter the subject and body of the email.
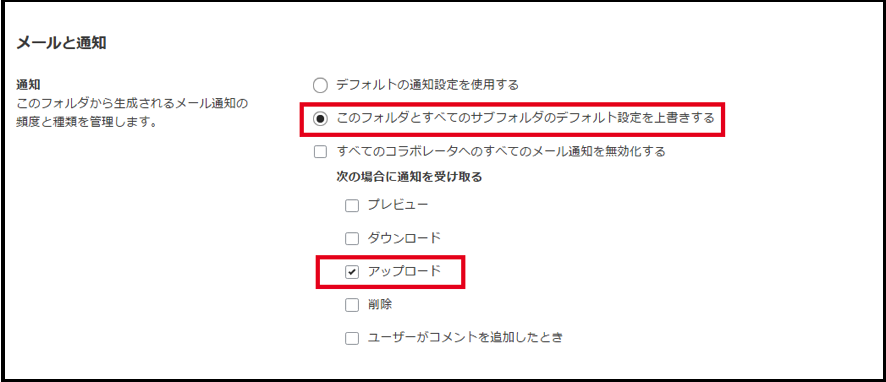
Optional: It is also possible to send a notification mail to yourself when the file is uploaded by setting shown below on the "設定 (Settings)" screen.
Use upload widget and upload from browser
-
Select or create the upload destination folder (here, called "テストフォルダ (Test Folder)").
-
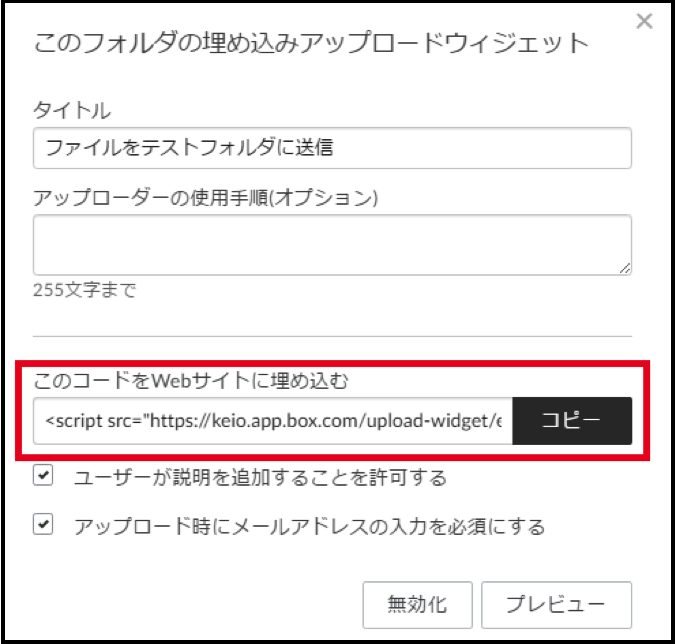
Select the folder and click "その他の操作 (More Actions)", "アップロード埋め込みウィジェット (Upload Embed Widget)".

-
Please copy the code displayed in "このコードをWebサイトに埋め込む (Place This Code in Your Website)" and place it in the HTML.
-
When they access the website from the browser, the upload widget will appear.
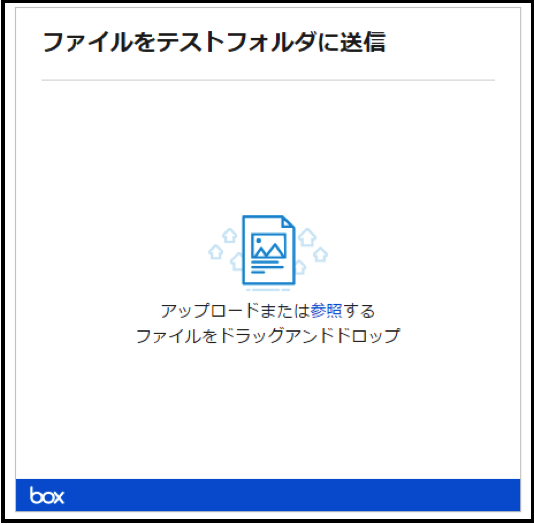
[Method 3] Having users upload files from browser without using the website
You can create an upload form using the file request function, and have users upload files from their browser.
For the overview of the file request function, refer to the following URL.https://support.box.com/hc/ja/articles/360043696574.
-
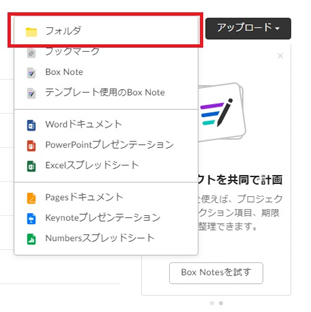
Create a folder for uploads. Select “Folder” from “New” in the menu at the top left. If the folder will be managed by multiple people in charge, lease invite the others as collaborators.
-
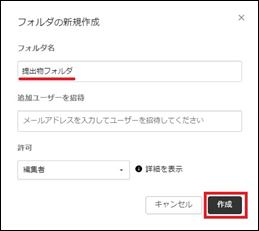
Fill the “Folder name” field, and then, click “Create.”
-
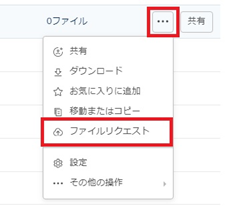
Click “...” of the created folder, and then, select “File Request.”
-
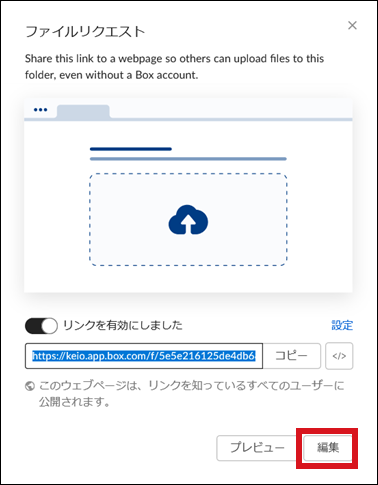
Click the "Edit" at the buttom of the file request window.
-
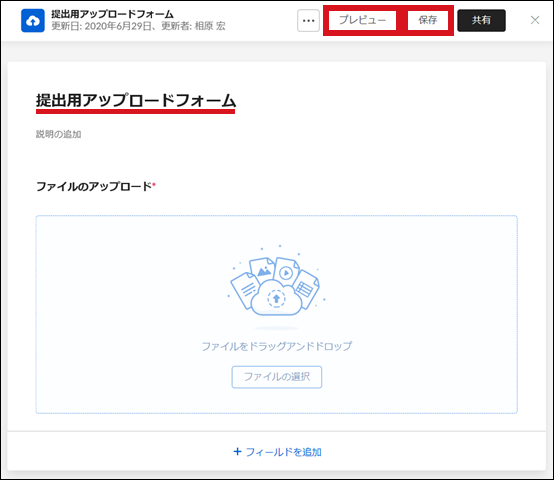
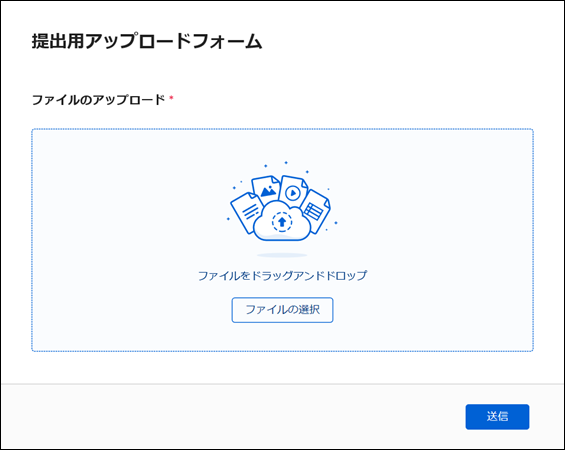
Input the title and clink the "Save". Click the "Preview" to make sure content and close.
Note: The bookmark setting can only accept up to 500 characters, so please avoid using long titles.
-
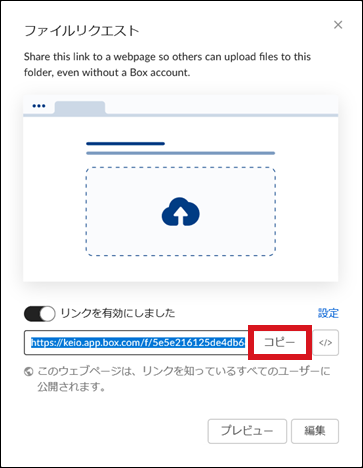
Open the folder and click “...”. Select “File Request.”and copy the file request of link.
-
Create a bookmark in the folder created in Step 1.
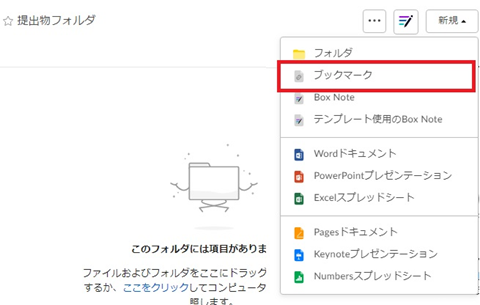
-
Paste the file request link copied in Step 5 as a URL. Enter any name you like and click “Create.” Note: The bookmark URL must not exceed 500 characters.
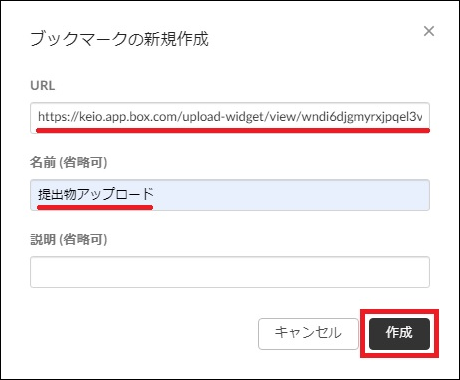
-
9. Configure the bookmark sharing settings. Click “Share.”

-
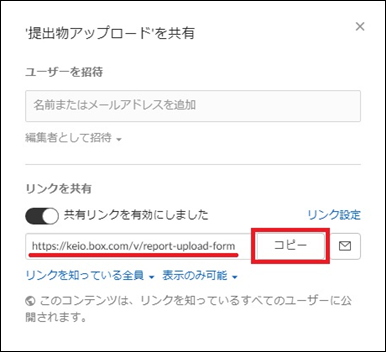
10. Enable “Share with others” and set access to “Anyone with the link.” If you want to customize the link, click “Link settings” and configure the non-private custom URL settings.
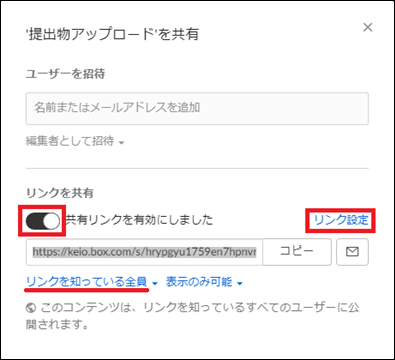
-
Click “Link settings” and check the box in the “Non-private custom URL” section of the shared link settings screen. Enter the custom URL and click “Save.” Note: Using custom links for highly confidential contents is not advisable
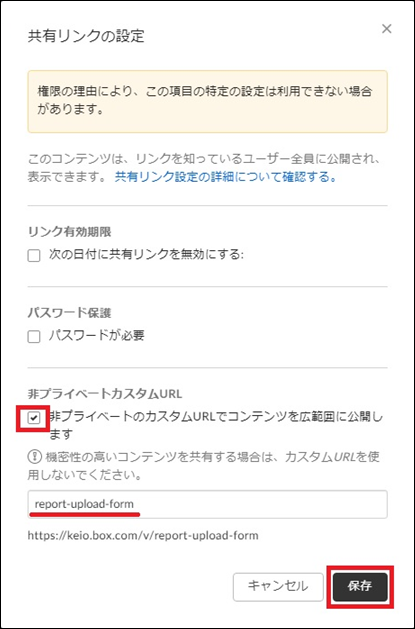
-
Copy the link and notify the users of the URL.
Last-Modified: November 15, 2021
The content ends at this position.


