


Forwarding setting method
- please perform one of the following
Setting under the Gmail - forwarding all email -
-
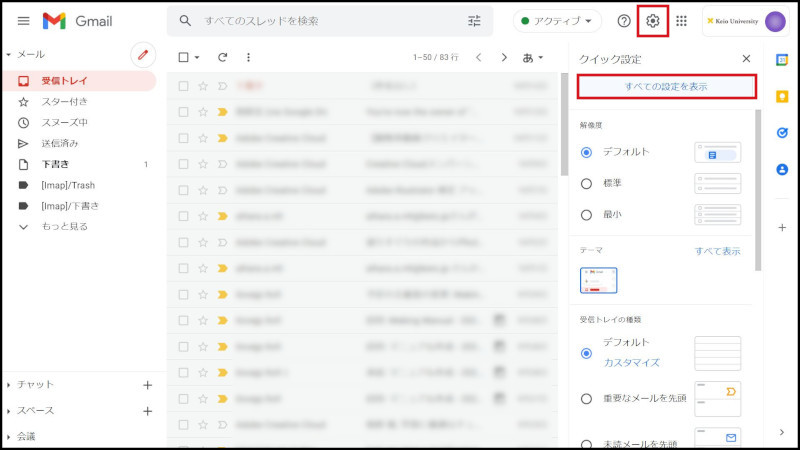
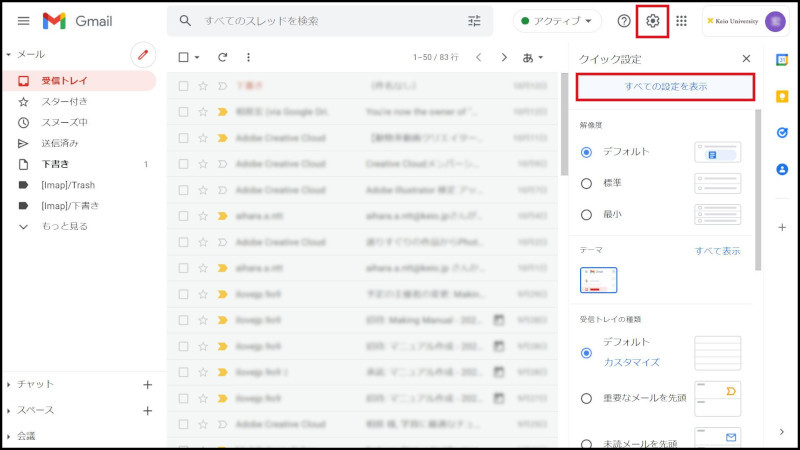
Login the Gmail. Click on gear of icon in the top right and click on "See all settings".
-
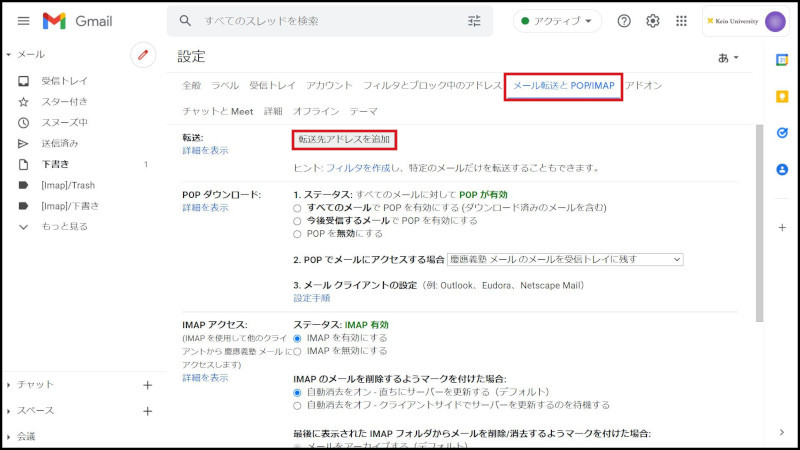
Click on "Forwarding and POP/IMAP"(tab), click "Add forwarding address".
-
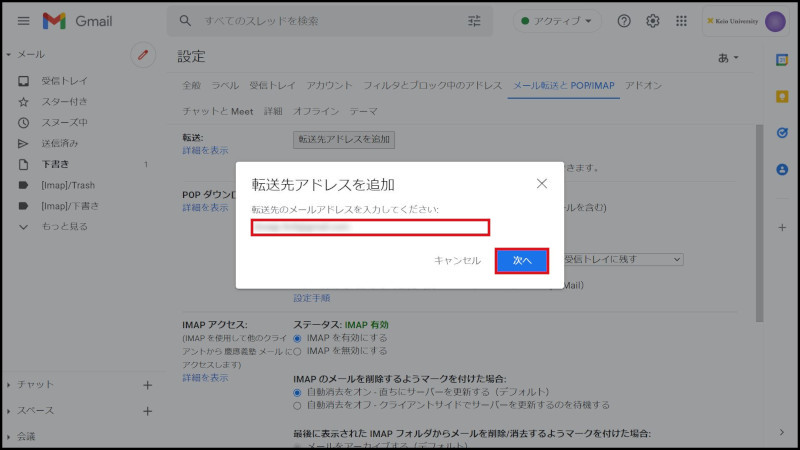
Enter forwarding destination email address, and click "Next".
-
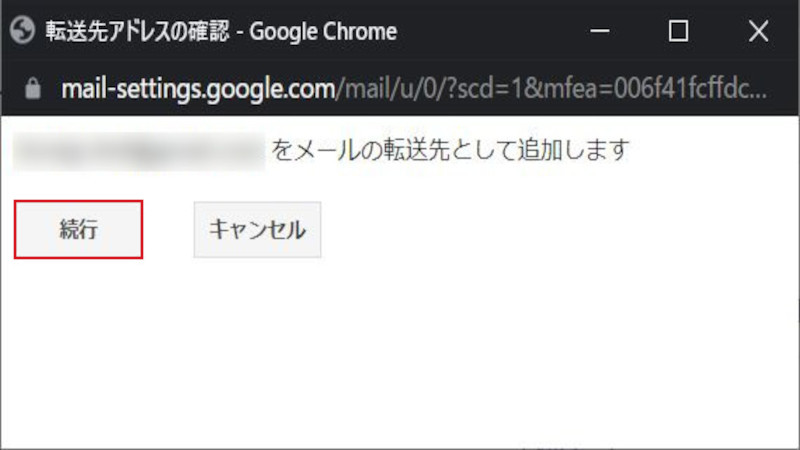
Forwarding destination confirmation message is displayed. If there are no problems, click "Continue".
-
Confirmation code is transmitted in order to confirm permission to the forwarding address
. Click "OK" to return to original screen.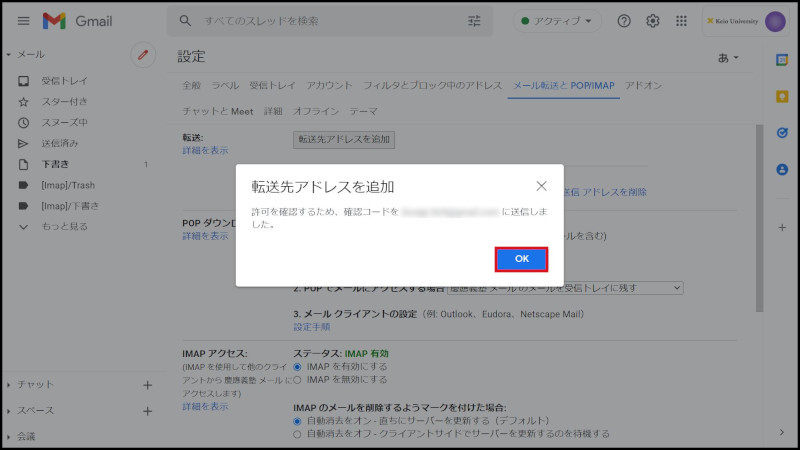
-
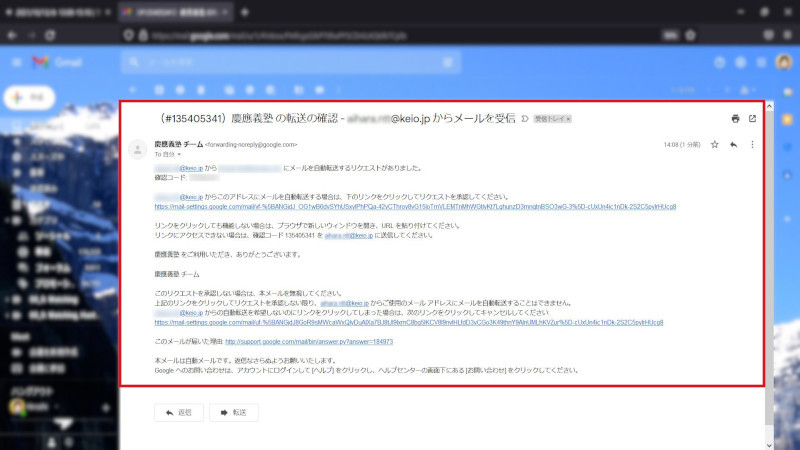
Open email transmitted on the forwarding destination address side and confirm the "Confirmation Code".
-
Enter the Confirmation Code and click "Confirm".

-
Confirm that the set address is in the display of the "forward received email to xxxxxxxx" that is forwarded.
And confirm that "Invalidate Forwarding" is entered in the check.
To forward to the set email address using a filter, advance to "Setting under Gmail - specifying conditions and forwarding-" without change.
To forward all email without using a filter, advance to the next item.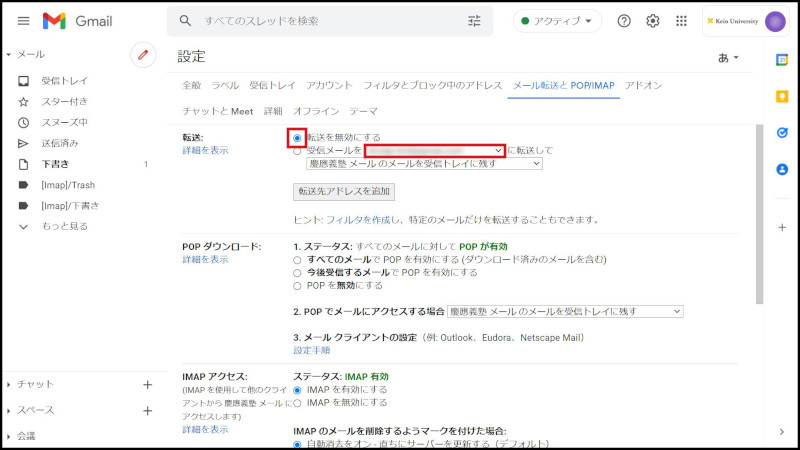
-
Check "forward received email to xxxxxxxx" and click "leave Keio Gijuku mail’s email in the inbox" and select "Removing email".
If forwarding can be set, click the button "Keep Changes" that is at the bottom of the screen.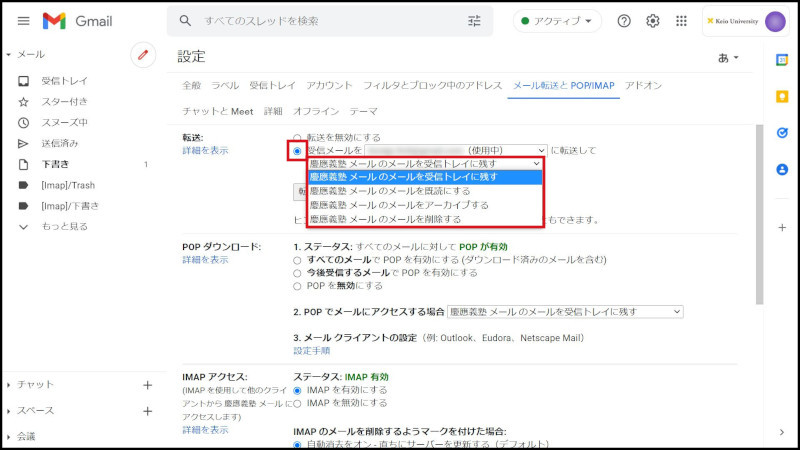
-
Change to inbox screen and display "Settings Kept."
This completes the setting procedure.
Setting under Gmail - specifying conditions and forwarding -
* Only persons who want to forward by specifying conditions such as the main text, email size limits etc. are requested to do this.
-
If the forwarding address is not registered, perform steps 1 to 9 in "Setting under Gmail - forwarding all email - " Even when forwarding individually, it is necessary to register the Email Forwarding address.
-
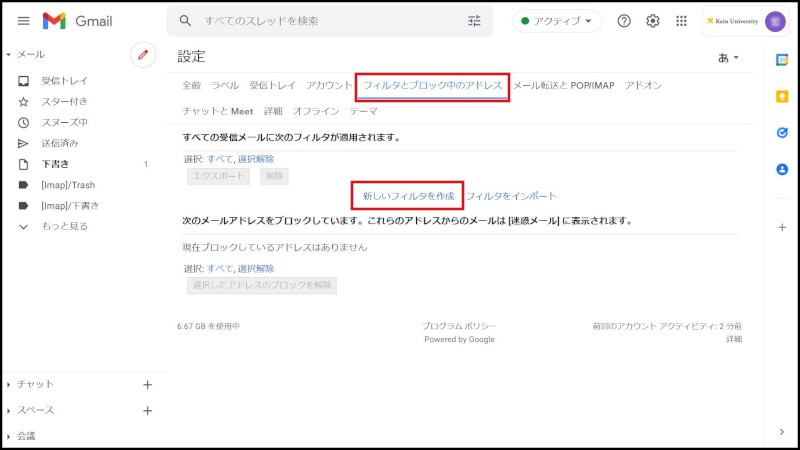
Click on gear of icon in the upper right, and click on "See all settings",
-
Click on "Filters and Blcked Addresses"(tab), click on "Create a new filter".
-
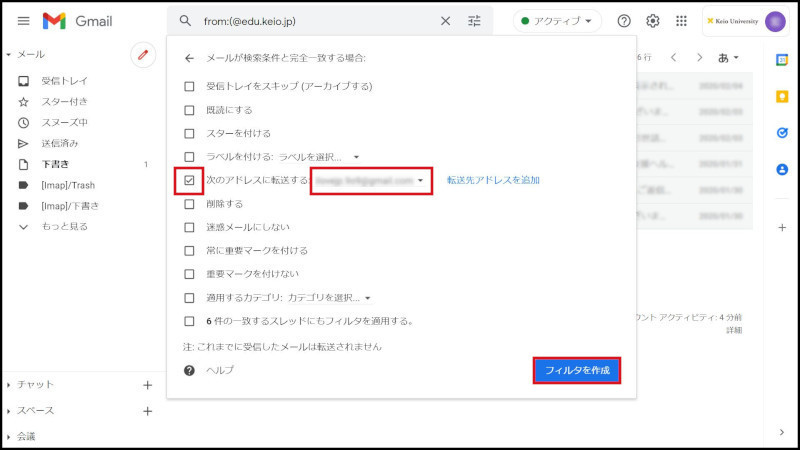
Enter the search condition and click on "Create filter".
Please set contents same as the setting of the current system (DEEPMail).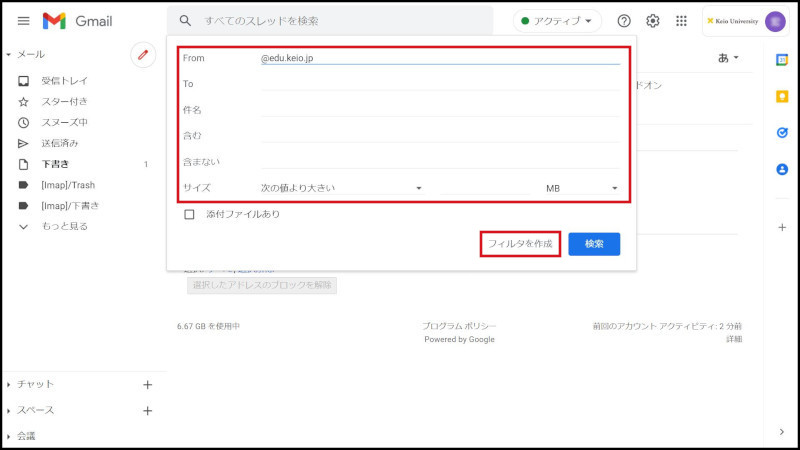
-
Enter Check to "Forward to next address", and click "Prepare filter".
-
After it is displayed as follows by the Filter(tab), preparation of the Filter is completed.
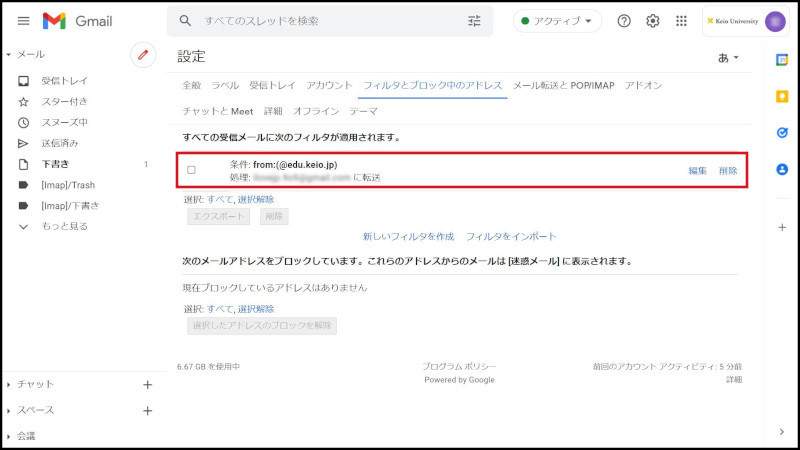
This completes the setting procedure.
Last-Modified: August 26, 2022
The content ends at this position.