


CNS connection settings for Windows11
Steps for connecting a wireless network
-
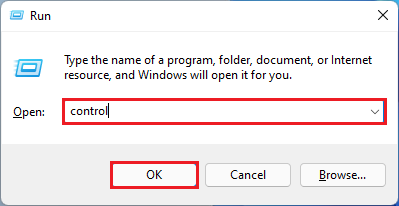
Press [Windows key] + [R key] at the same time and type "control" in the [Run] screen.
After typing, press [OK] to display the control panel.
-
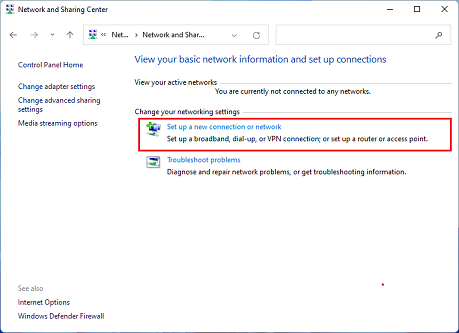
Click [Network and Internet], [Network and Sharing Center], and then [Set up a new Connection or Network].
-
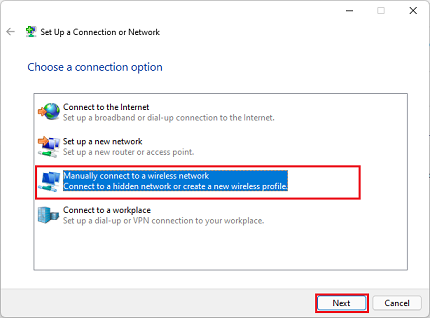
Select [Manually connect to a wireless network] and click [Next].
-
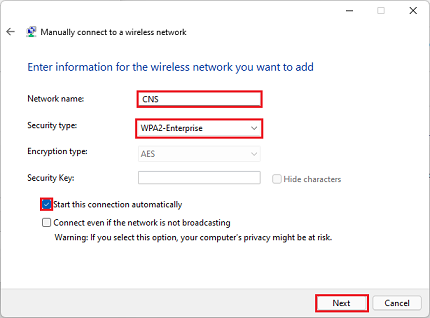
Make the following settings and click [Next].
・[Network name]: CNS
・[Security type]: WPA2-Enterprise
・[Start this connection automatically]: Check
-
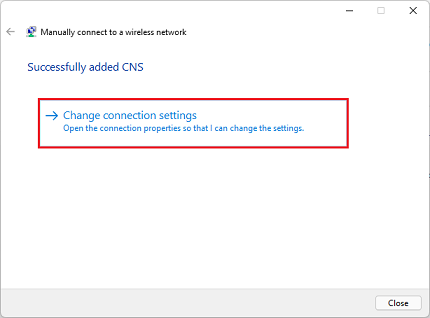
Click [Change connection settings].
-
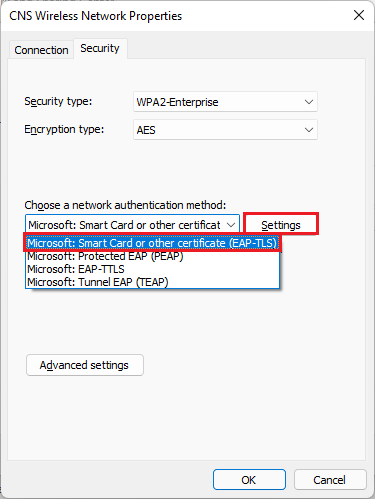
Open the [Security] tag in the [CNS Wireless Network Properties], select [Microsoft: Smart Card or other certificate(EAP-TLS)] in the [Choose a network authentication method], and click [Settings].
-
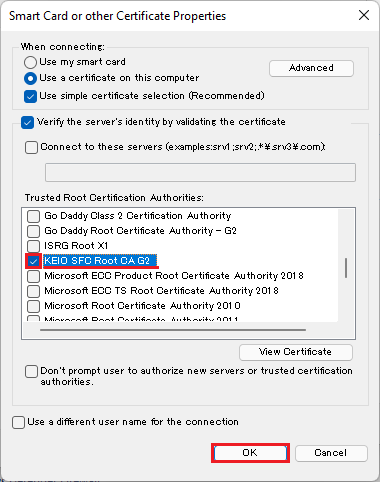
Check [KEIO SFC Root CA G3], click [OK], and click [OK] for [CNS Wireless Network Properties] as well.
-
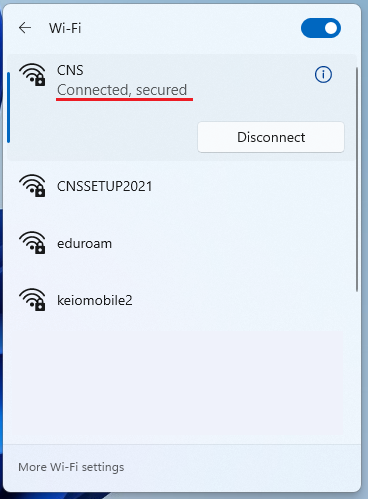
Check the Wi-Fi list and confirm that you are connected to the CNS network, then the connection is complete.
Last-Modified: January 20, 2026
The content ends at this position.