


Connection Settings for CNS2 on Android 16
Wi-Fi Connection Setup on Android 16 (Pixel 8a)
- Please register your MAC address before proceeding with the connection setup.
How to Find the MAC Address (Pixel 8a)
-
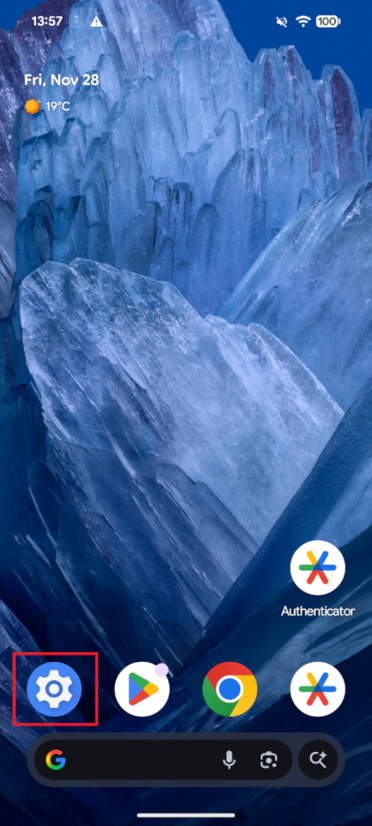
From the Home screen, tap [Settings].
-
Scroll to the bottom of the [Settings] screen and tap [About phone].

-
The alphanumeric characters listed under [Device Wi-Fi MAC address]
at the bottom of the [About phone] screen are your MAC address.
*Example MAC address: 00:00:5E:00:53:00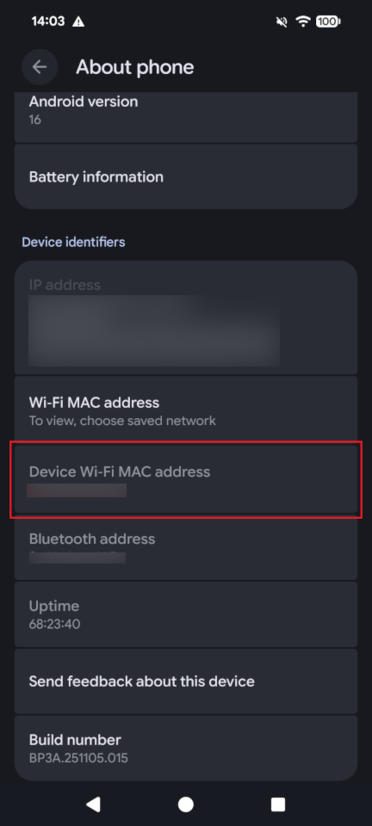
Connection Settings
-
From the Home screen, tap [Settings].
-
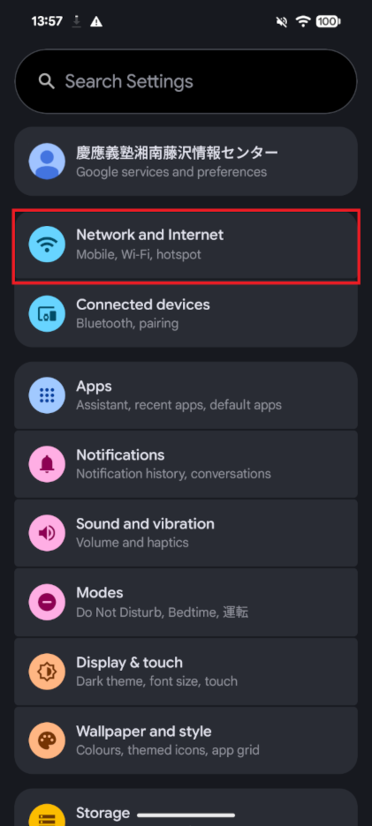
On the [Settings] screen, tap [Network and internet].
-
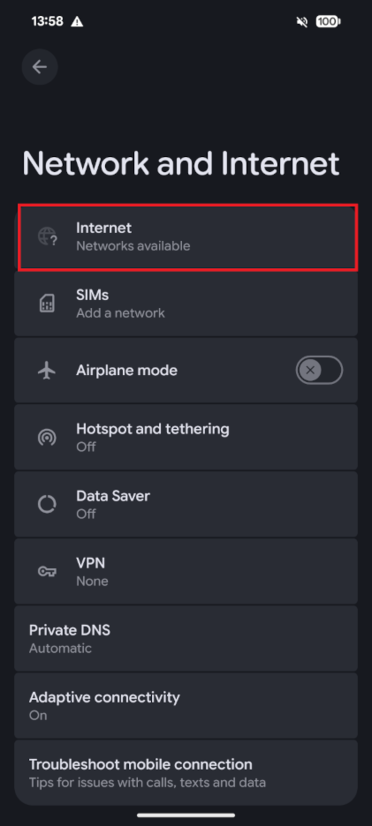
On the [Network and internet] screen, tap [Internet].
-
Scroll to the bottom of the [Internet] screen and tap [Add network].
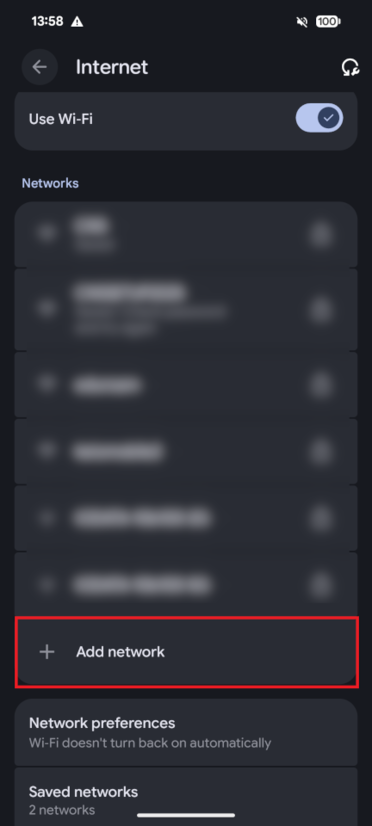
-
On the [Add network] screen, enter [CNS2] in the [Network name*] field, and then tap [Advanced options].
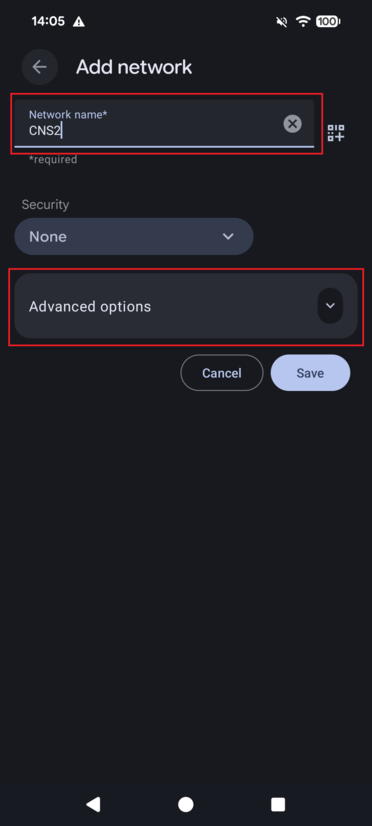
-
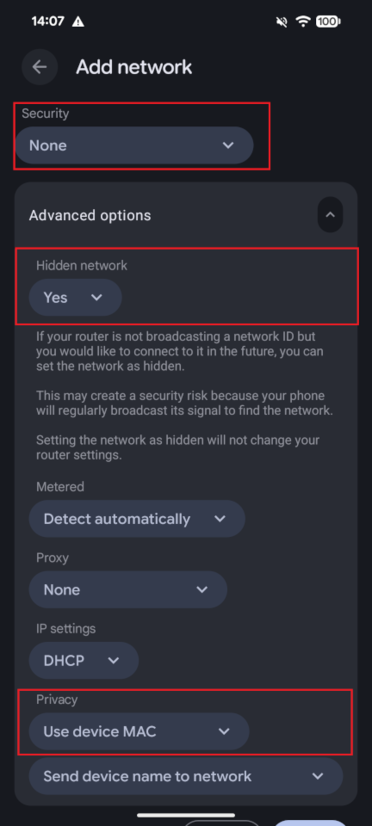
Select the following for each item, and then tap [Save].
[Security]: Select [None]
[Hidden network]: Select [Yes]
[Privacy]: Select [Use device MAC]
-
After tapping [Save] in the previous step, you will return to the [Internet] screen.
Verify that [CNS2] has been added and that [Saved] appears below it.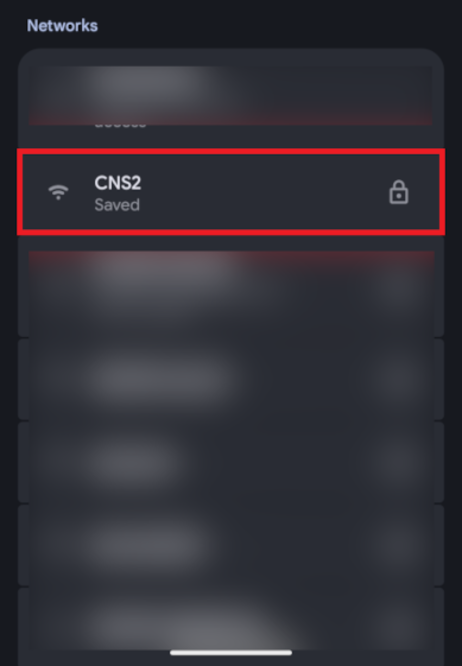
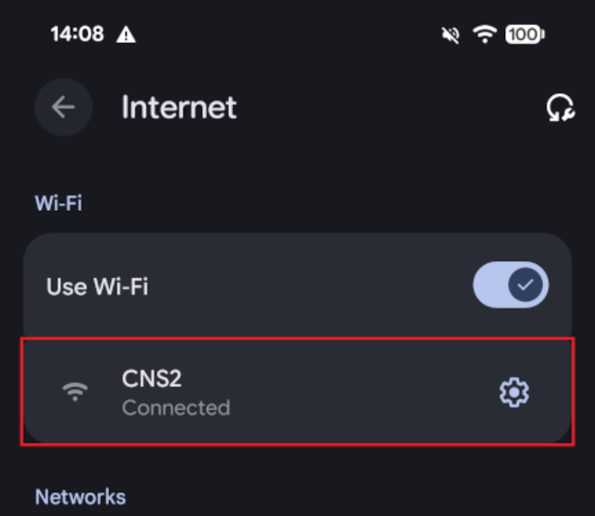
-
Tap [CNS2]. The setup is complete when [Connected] appears below [CNS2] after waiting for a few dozen seconds.
Last-Modified: December 15, 2025
The content ends at this position.