


CNS3 connection settings for Android 11
CNS3 connection settings for Android 11
This is the setup procedure for the Google Pixel4a.
- Download the Root certificate of CNS from the following link.

KEIO_SFC_Root_CA_G2
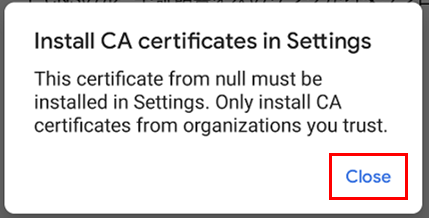
- When the message "Install CA certificates in Settings" appears, tap "Close."
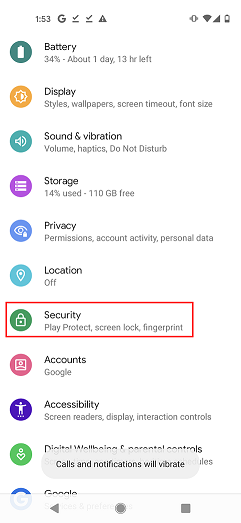
- Tap [Settings] -> [Security].
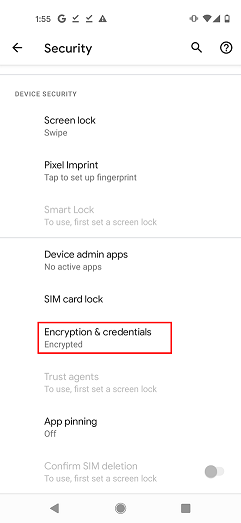
- Tap [Encryption and credentials].
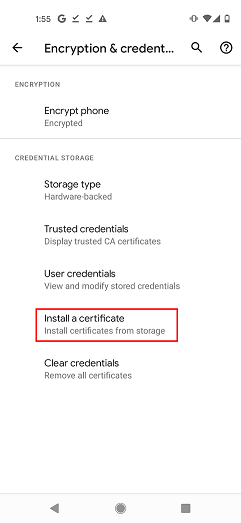
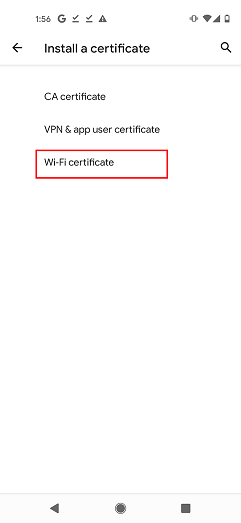
- Tap [Install a certificate].
- Tap [Wi-Fi certificate].
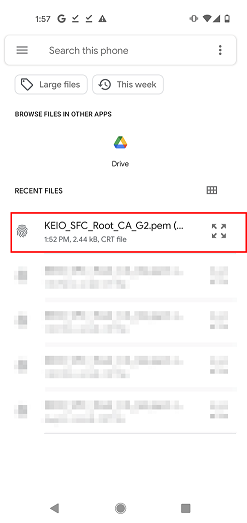
- Tap [KEIO_SFC_Root_CA_G2.pem].
-
Feel free to enter a name for this certificate and tap OK (in this example, we have entered CNS3).
The installation is complete when the message "Wi-Fi certificate installed" appears at the bottom of the screen.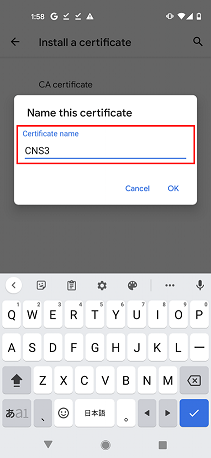
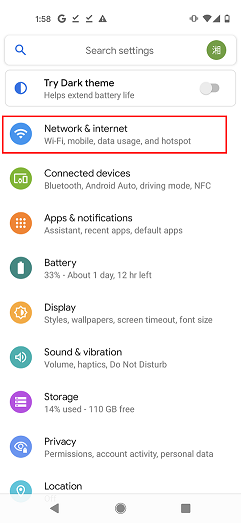
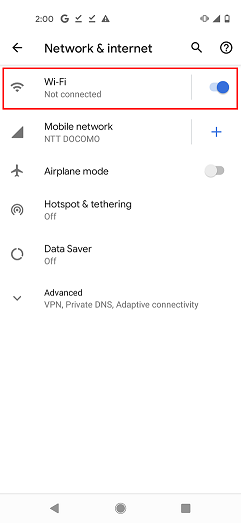
- Tap [Settings] → [Network & internet].
- Tap [Wi-Fi].
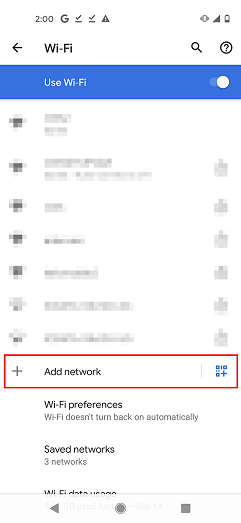
- Tap [Add network].
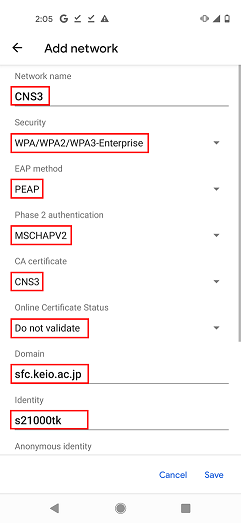
- Enter CNS3 in the [Network Name] field.
For [Security], select [WPA/WPA2/WPA3-Enterprise].
For [EAP method], select [PEAP].
For [Phase 2 authentication], select [MSCHAPV2].
For [CA certificate], select [CNS3](Certificate name as named in item 8).
For [Online Authentication Status], sekect [Do not validate].
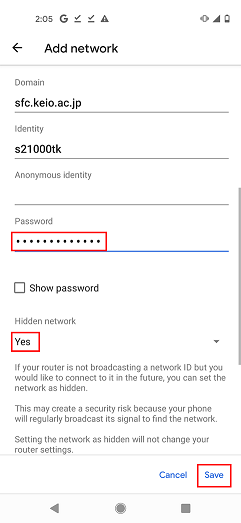
For [Domain], enter [sfc.keio.ac.jp].
For [Identity], enter your CNS login name.
- For Password, enter the password for PEAP.
Tap [Advanced options], Change [Hidden network] to [Yes] and tap [Save].
- If the information you entered is correct, wait for a few seconds to complete the connection to CNS3.
If you cannot connect, please delete the network settings of CNS3 and start over from the installation of Wi-Fi certificate.
Last-Modified: September 15, 2021
The content ends at this position.