


How to set up SSH keys in PuTTY
Generate a public/private SSH keys
- Access to SSH key generating page and log in with your CNS account.
Convert SSH Key
-
You can not use the SSH Key pairs which downloaded from SSH key generating page as it is OpenSSH type.
Convert SSH private key by using PuTTYgen.
How to set up PuTTY
- Install PuTTY first.
- Launch PuTTY, select [Connection] -> [SSH] -> [Auth] -> [Credentials] and click [Browse].
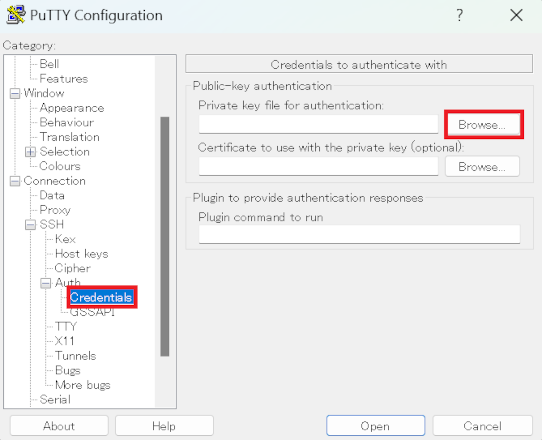
- Select the saved private key, and then click [Open].
Under certain working environment, the filename extension may differ. Please change the [file type] to all file if the file is not found.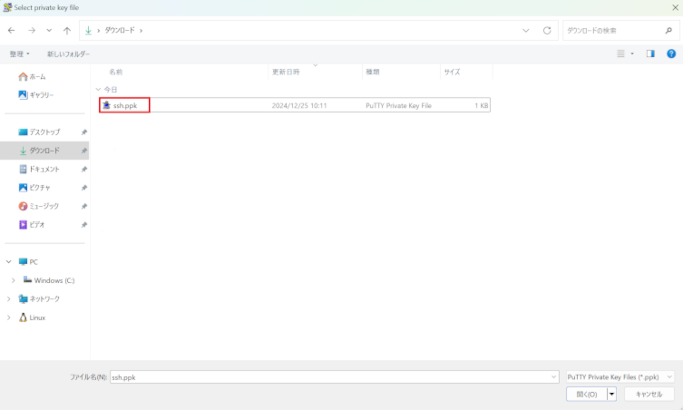
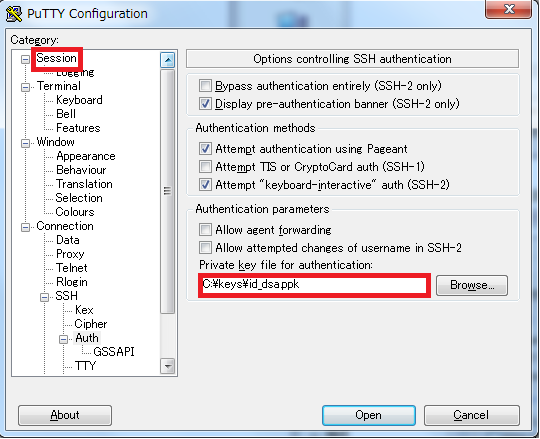
- Review the private key file for authentication, and then click the [session] on the left side of the screen.
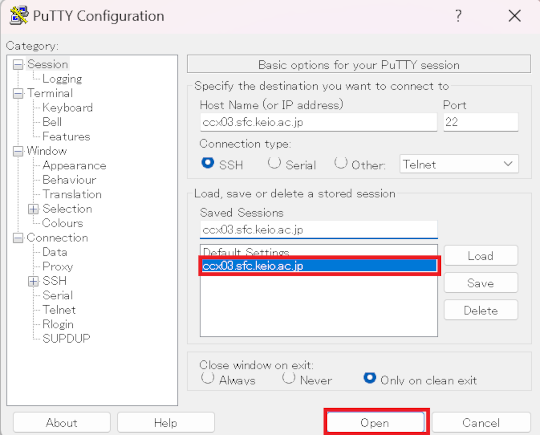
- Set host name and saved session to CNS server like ccx03 or ccz00, and then click Save.
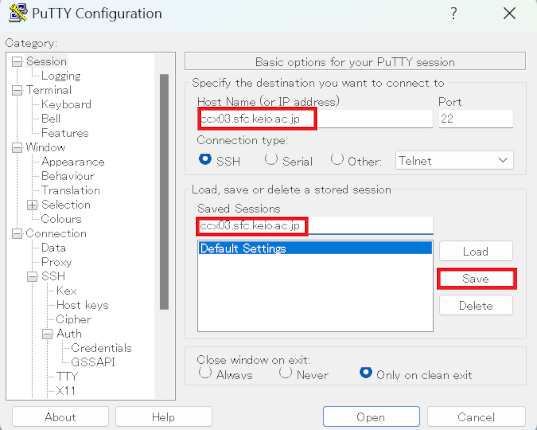
- Select the session that you saved from the session list, and then click Open.
-
After type your CNS ID in [login as:],enter the passphrase that you entered in SSH key generation page.

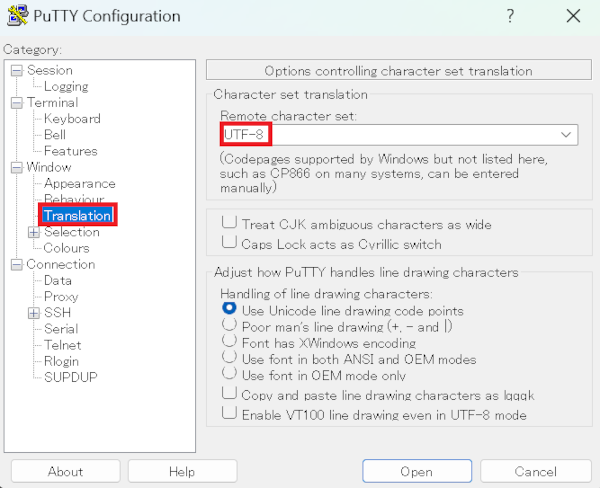
Set up character code
If the characters are garbled, change the character encoding to UTF-8.
- Click [Translation] from Window category and select [UTF-8].
How to install PuTTY
- Open the Web page https://www.ranvis.com/putty
- Download the latest version of the installer located in Downloads.
- Run the installer and follow the messages to install. If blocked by "Microsoft Defender SmartScreen" when running, Click "More info" and press "Run anyway".
Last-Modified: December 25, 2024
The content ends at this position.