


- Top >
- Computer >
- E-mail >
- About using e-mails >
- Mail Settings >
Gmail/Android(IMAP4)
Gmail/Android (IMAP4)
How to use IMAP4 for Gmail/Android
-
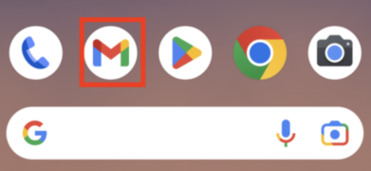
Open the Gmail app.
-
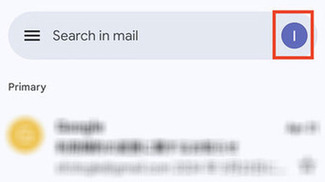
Tap the icon on the right side of the search bar at the top.
-
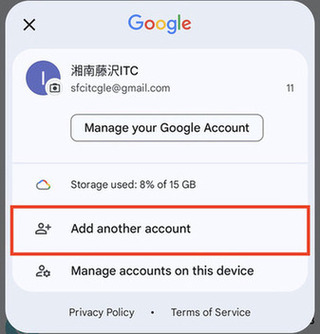
Tap [Add another account].
-
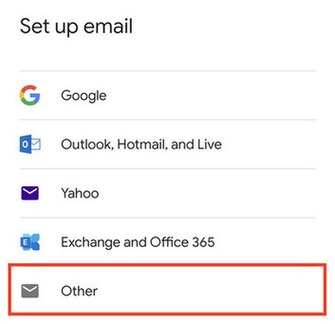
Tap [Other].
-
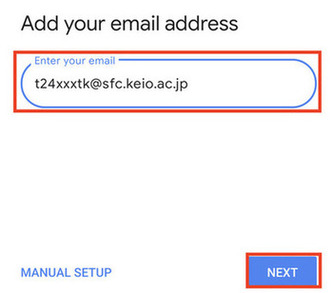
Enter your CNS email address in [Enter your email address] and tap [Next].
-
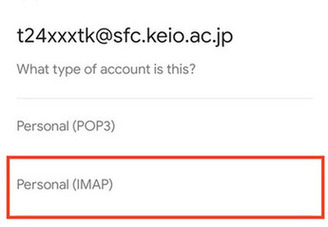
Select [Personal (IMAP)].
-
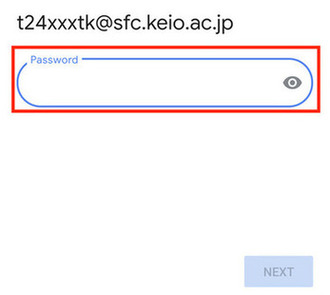
Enter your IMAP/SMTP AUTH password in [Password] and tap [Next].
-
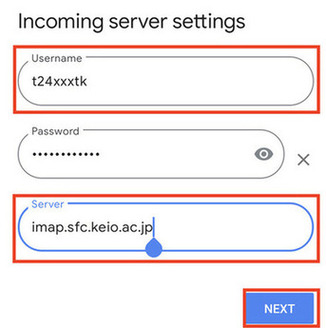
Change [Username] to your CNS login name (remove @sfc.keio.ac.jp), and tap [Next]. Change [Server] to "imap.sfc.keio.ac.jp" and tap [Next].
-
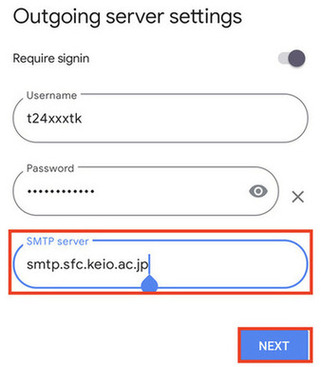
Change [IMAP Server] to "smtp.sfc.keio.ac.jp" and tap [Next].
-
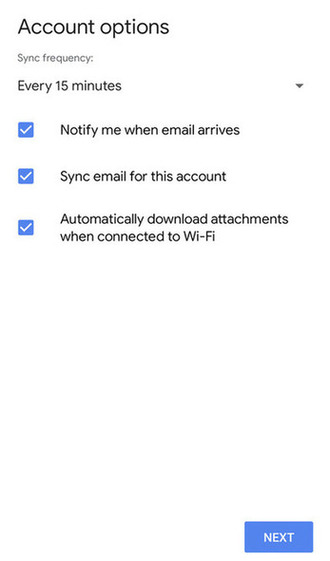
Select any optional settings.
-
Enter "CNS" in [Account name (optional)].
Enter your name in [Your name]. After entering, tap [Next].

-
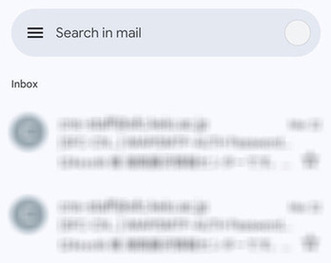
Open the Gmail app.
Tap the icon on the right side of the search bar at the top and confirm that the CNS account is displayed in the account list.

-
Tap the CNS account and confirm that you can send and receive emails.
Last-Modified: April 10, 2025
The content ends at this position.