







- Top >
SPAM Filter Setup Example: Microsoft Outlook (classic) (macOS)
Setup Procedure
The following is a setup example for Microsoft Outlook (classic) on macOS.
- Launch Outlook (Classic).
-
Make sure [Legacy Outlook] in the top right corner of the screen is turned [On]. (If it is [Off], you are running Outlook (New))
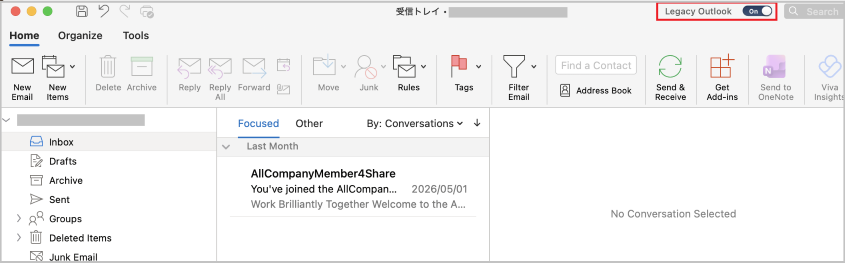
-
Hold down the Control key and click [Inbox].
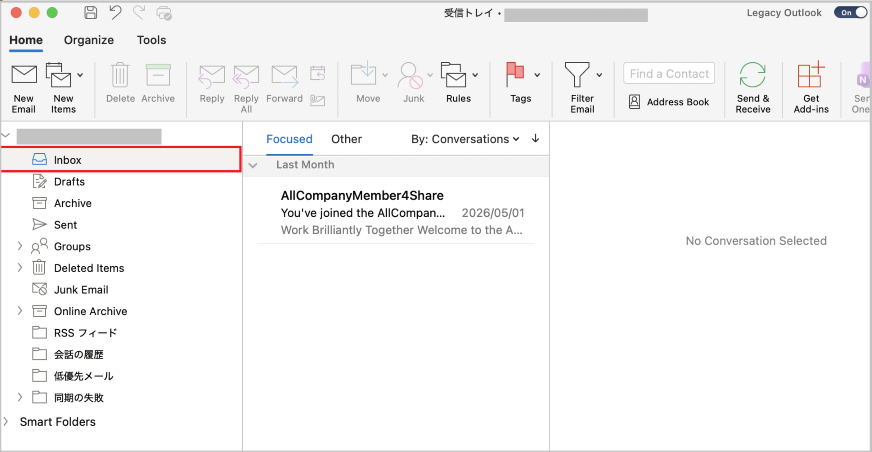
-
Select [New Folder].
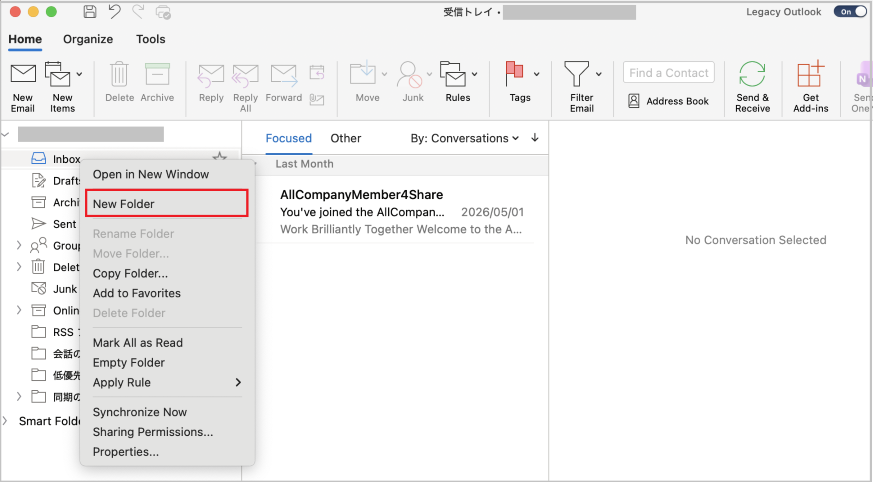
-
An input field will appear. Type [SPAM] in it.
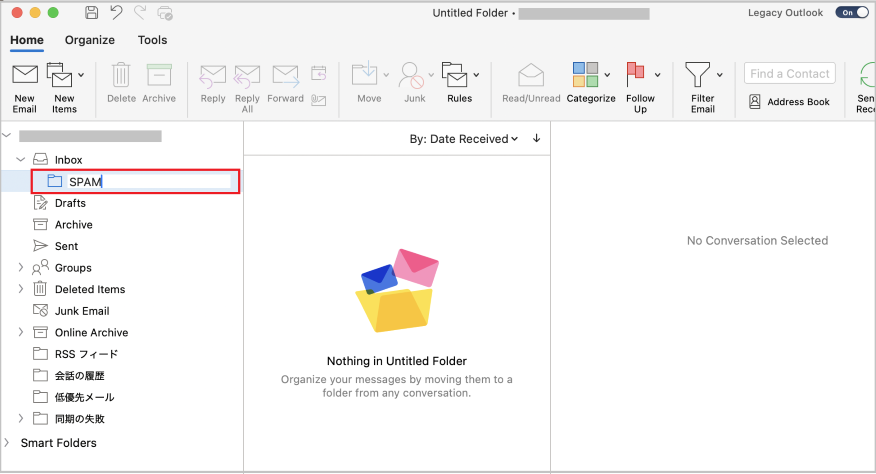
-
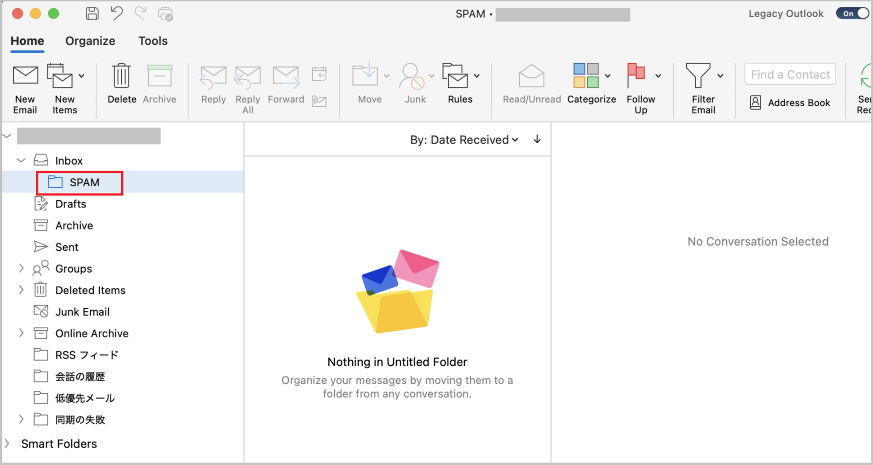
Verify that the folder named [SPAM] has been created.
-
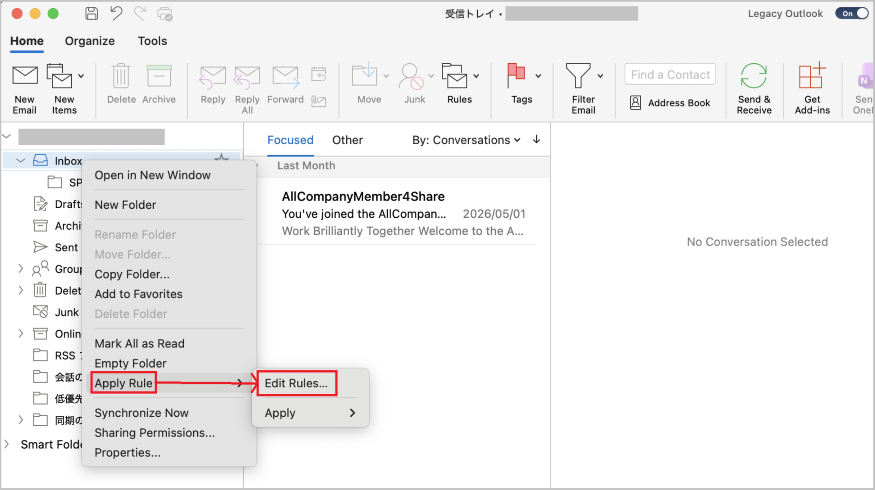
Hold down the Control key and click [Inbox] again.
-
Hover over [Apply Rules] and click [Edit Rules...].
-
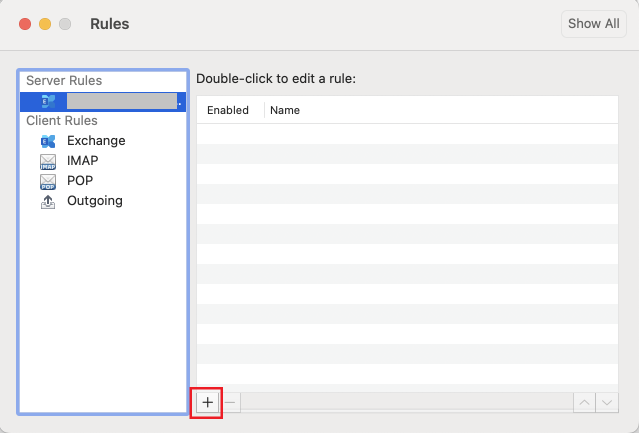
The [Rules] window will open. Click the [+] button at the bottom of the window.
-
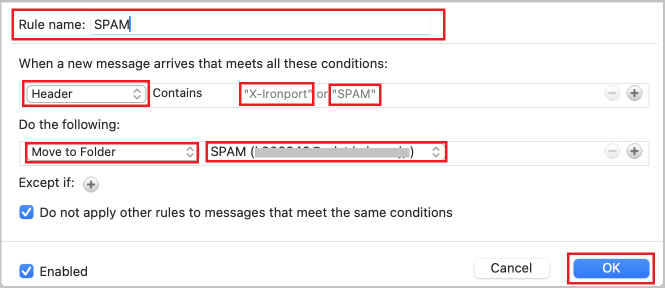
A settings window will open. Enter [SPAM] as the rule name, configure the following settings, and click [OK].
-
[When a new message arrives that meets all these conditions:] section
- Header
- X-Ironport
- SPAM
-
[Do the following:] section
- Move Message
- Select the [SPAM] folder you just created.
-
[When a new message arrives that meets all these conditions:] section
-
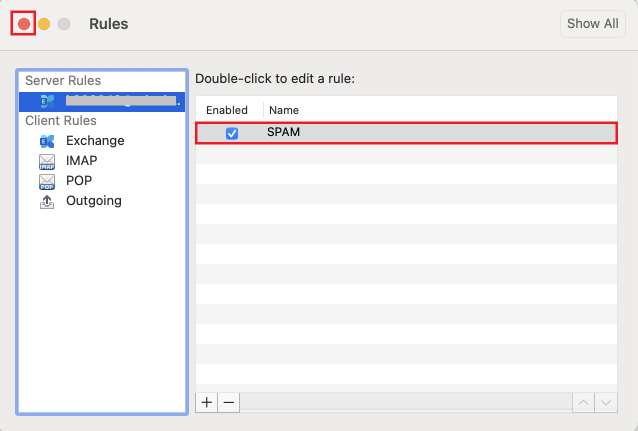
You will return to the [Rules] window. Verify that the [SPAM] rule you just configured is checked as enabled, then click the red button in the top-left corner to close the window.
-
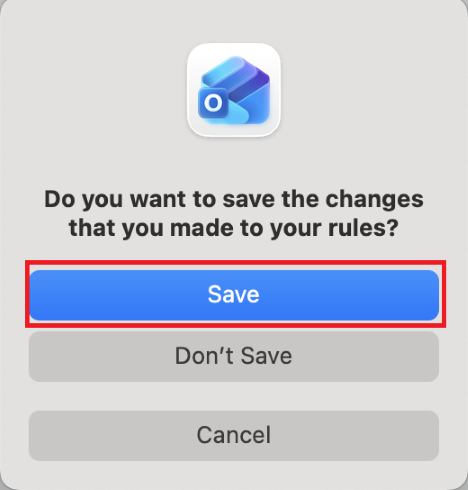
A prompt asking [Do you want to save changes that you made to your rules?] will appear. Click [Save].
- This completes the filtering setup.
Last-Modified: July 31, 2026
The content ends at this position.