


CNS2 connection settings for macOS 15 Sequoia
Here's how to set it up using the standard macOS features.
※
If you have not registered your device, please perform the procedure after registration.
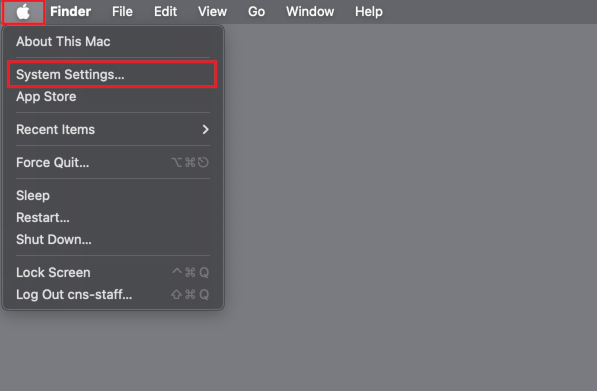
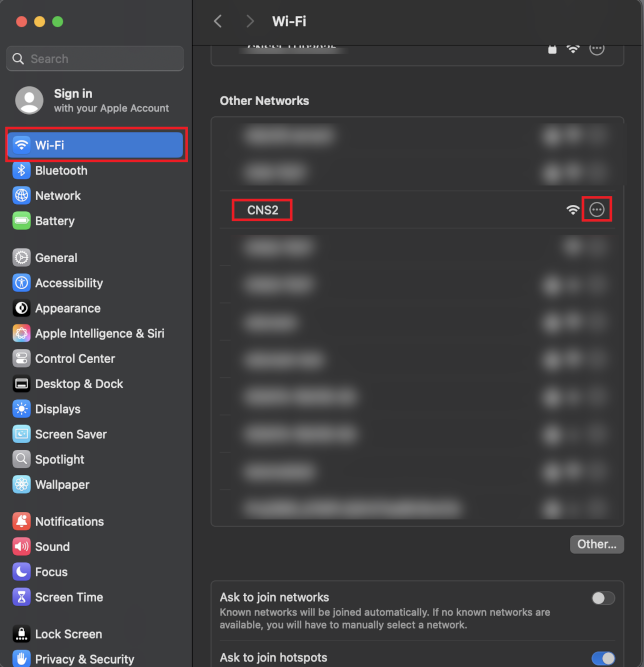
- Select [System Setting] from the Apple menu in the upper right corner of the screen.
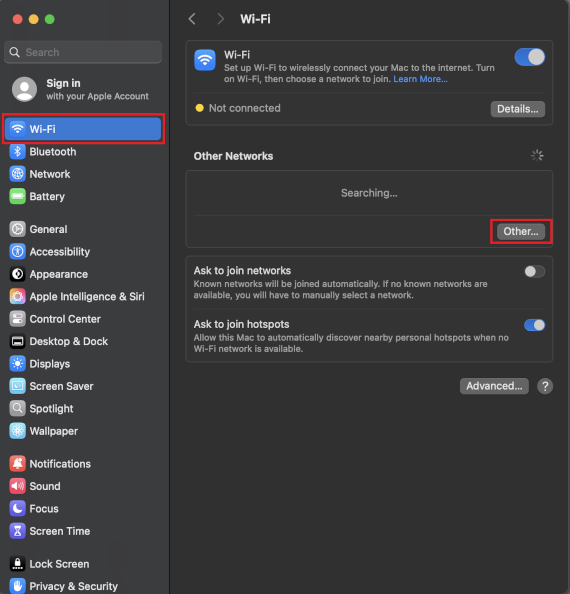
- Click on [Wi-Fi] and select [Other...].
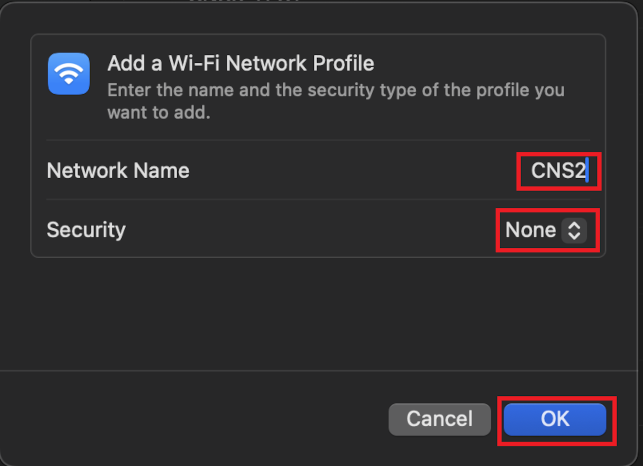
- Enter Network Name: [CNS2], Security: [None], and click [OK].
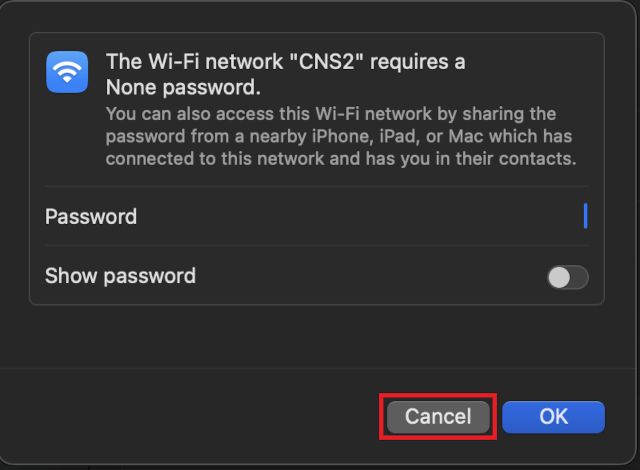
- Click [Cancel] when you see a screen that says [The Wi-Fi network "CNS2" requires a None password]
-
Click [・・・] at the end of [Other Networks] and [CNS2] will be added.
-
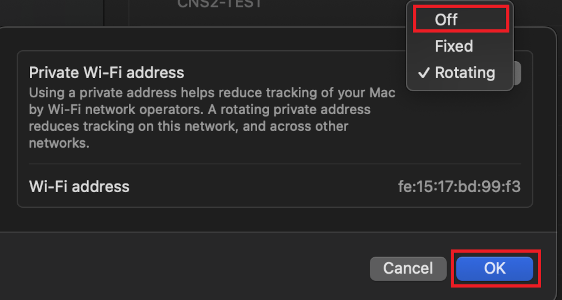
Under [Private Wi-Fi Address], select [Off] and click [OK].
-
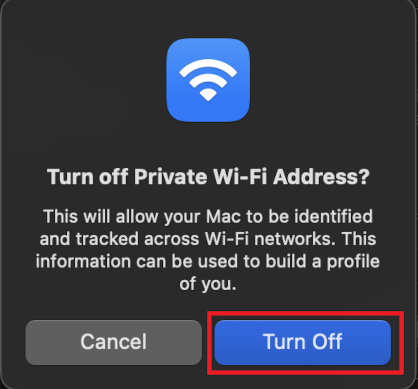
When the [Turn off private Wi-Fi address?] screen appears, select [Turn off].
-
Confirm that [Private Wi-Fi Address] is set to [Off] and that the [Wi-Fi Address] is the same as
the MAC address registered with the device, then click [OK].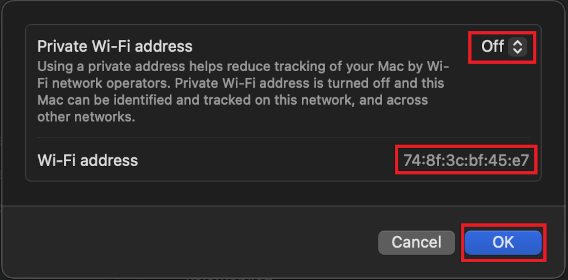
-
Click [Other...] again.
-
Enter Network Name: [CNS2], Security: [None], and click [OK].
-
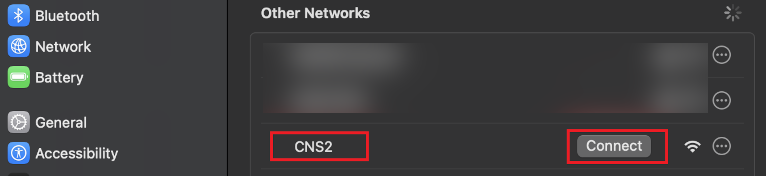
Move the cursor over [CNS2] and click [Connect].
-
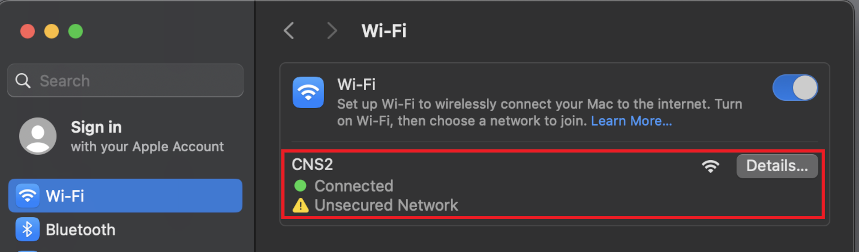
If [Connected] is displayed, the setup is complete.
Last-Modified: August 5, 2025
The content ends at this position.