


How to IPSec-VPN (macOS)
[Recommended] How to connect with GlobalProtect
-
Open the WebVPN login windows, enter your CNS login name and CNS login password.
https://vpn24.sfc.keio.ac.jp/ -
Click on GlobalProtect Agent in the upper right corner.
-
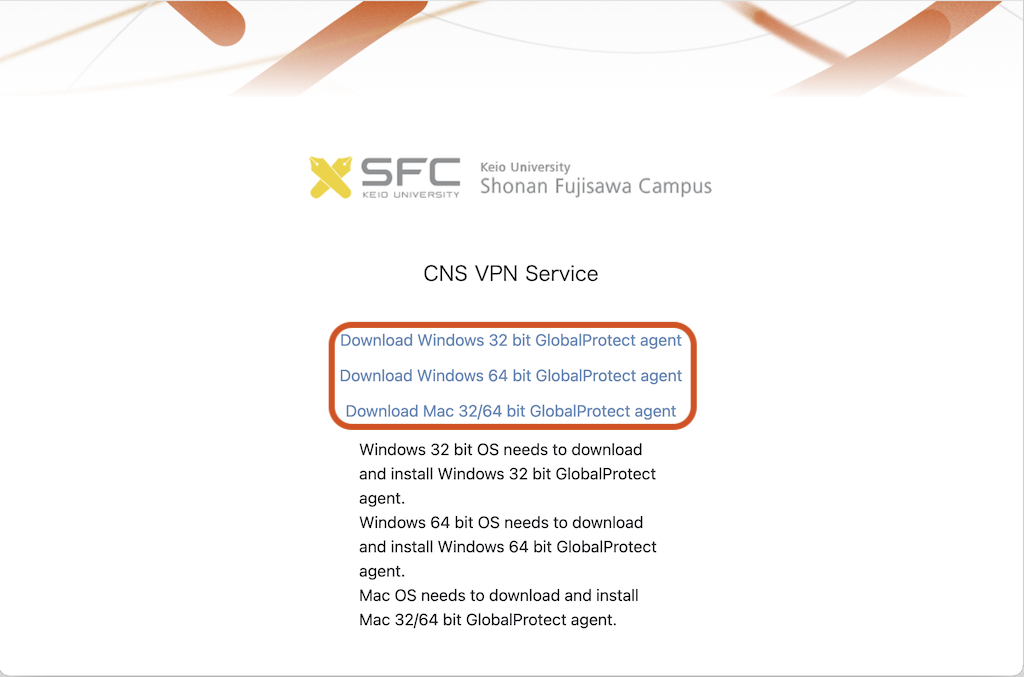
Download the Mac 32/64 bit Installer.
- Double-click the downloaded GlobalProtect.pkg and follow the on-screen instructions to install.
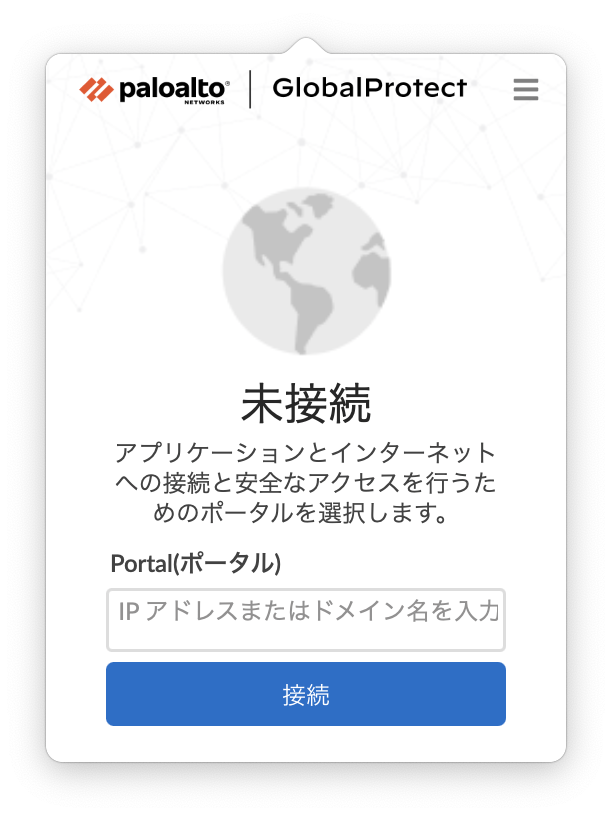
- After installation, enter “vpn24.sfc.keio.ac.jp” in the Portal field and click Connect.
-
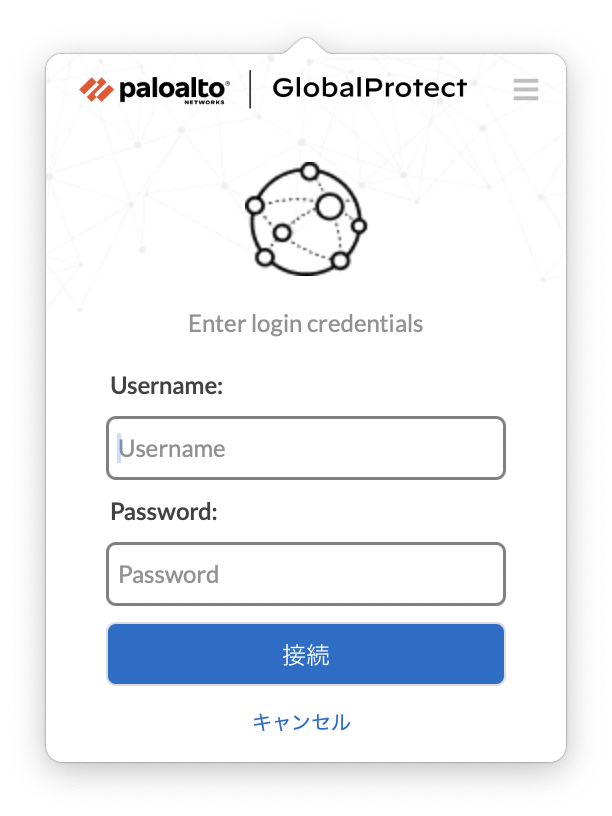
When prompted, enter your CNS login name and CNS login password. Click Sign in.
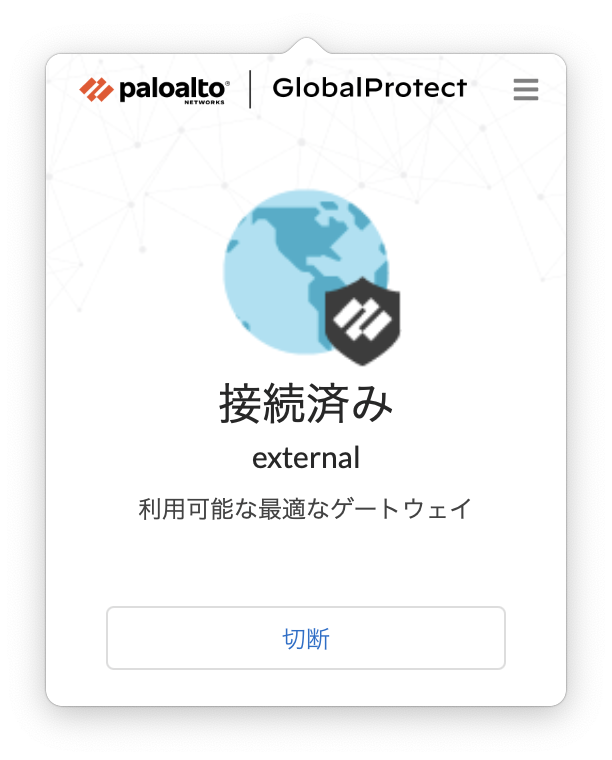
- When successfully connected, the status changes to Connected.
-
Click Disconnect to disconnect (be sure to disconnect when not in use).
- The next time you want to connect to the VPN, click on the GlobalProtect icon on the menu bar and click Connect.
- If you have trouble connecting, go to your Mac's system settings and launch “Security and Privacy”.
- GlobalProtect software is blocked, press “Allow".
- After authorization, select the GlobalProtect icon in the upper right corner of the screen, and the User ID and Password window will appear.
How to connect without Globalprotect
-
Launch System Settings and click on “Network".

-
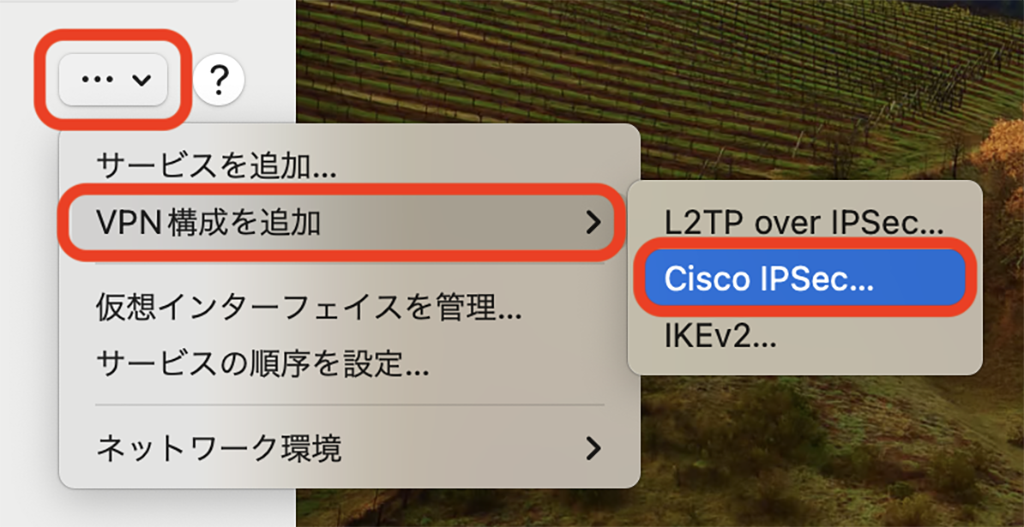
In the lower right corner of the screen, click [...]. at the bottom right of the screen, click [Add VPN
Configuration] → [Cisco IPSec].
-
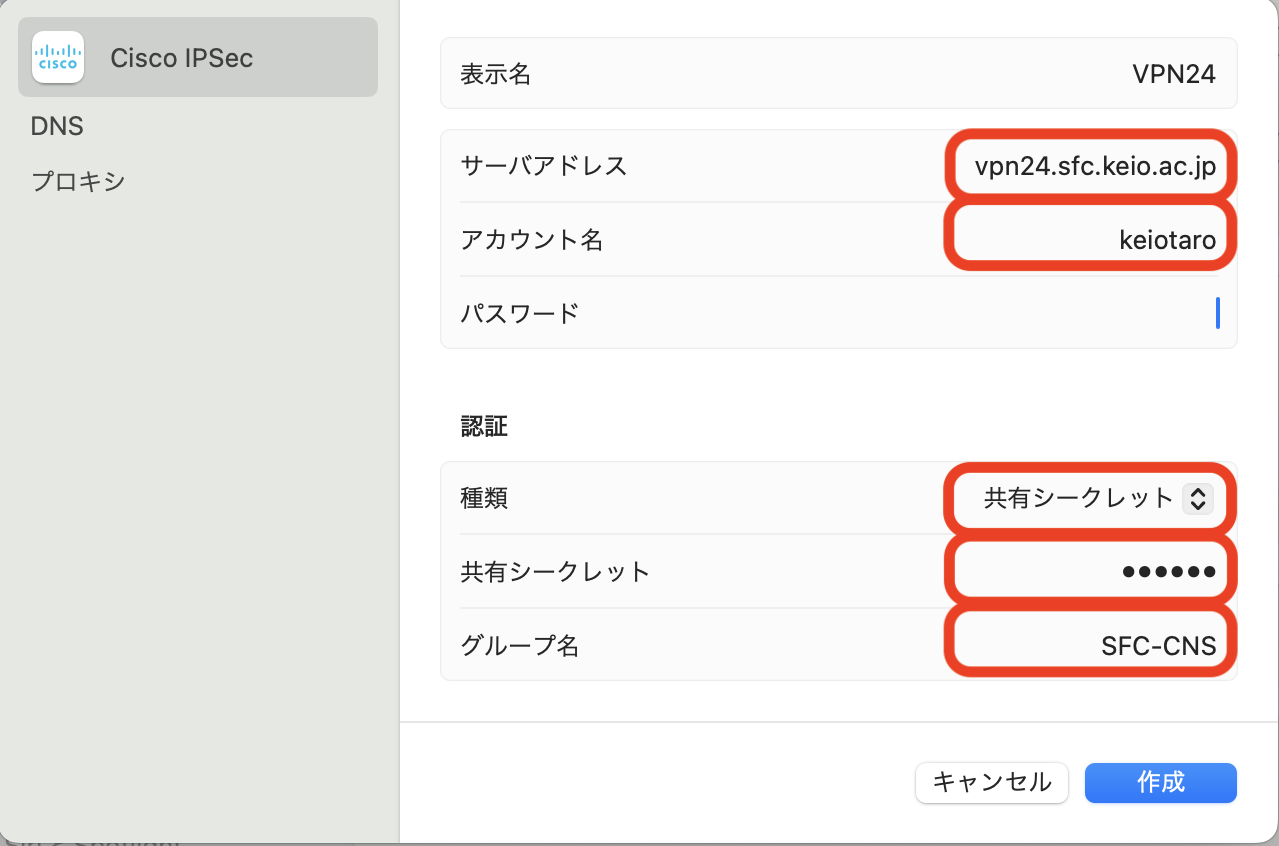
Enter the following information and click “Create".
- Display name: Any
- Account name: CNS login name
- Password: blank (to be entered later)
- Type: Shared Secret
- Shared Secret: cnsvpn
- Group: SFC-CNS
-
Click [VPN] on the left side of the screen to activate the settings created above.

-
Make sure the CNS login name is entered for Account Name, enter the CNS login password for Password, and click
OK.
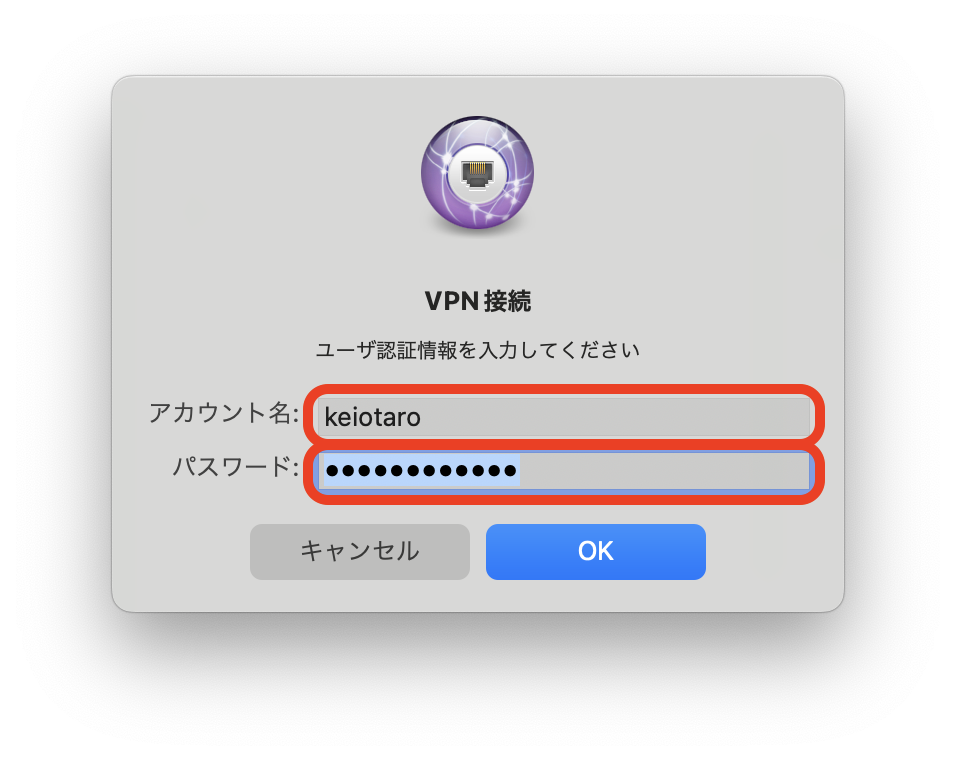
- The connection is now complete.
- Turn off VPN settings when disconnecting.
Last-Modified: October 9, 2024
The content ends at this position.