


Automatically sort emails using filters
By using the filter function, you can automatically label or star emails based on certain criteria, and delete or archive them. Email filters can be set by "Set all settings" from "Setting (Gear) icon" and "See all settings" at the top of the screen, and select the "Filters" tab on the display screen. (Fig. 1,2)
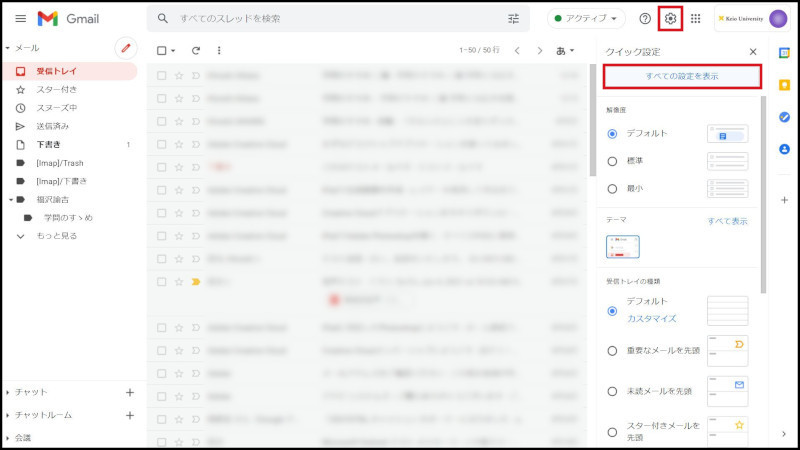
Fig. 1 Filters setting screen
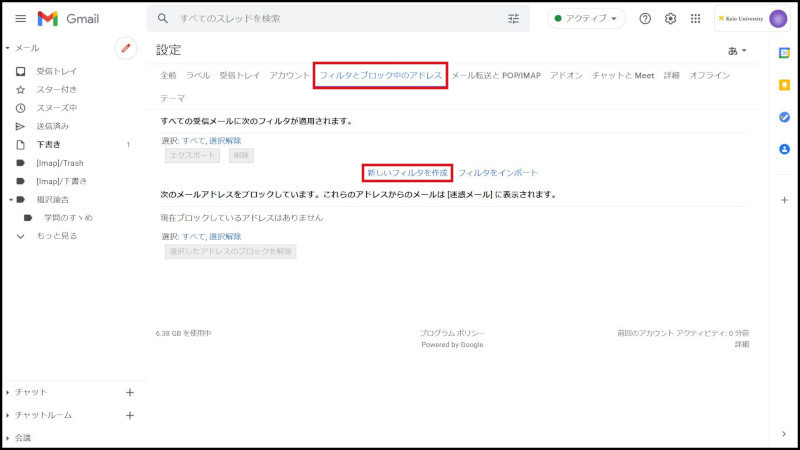
Fig. 2 Filters setting screen
Clicking "Create a New Filter" in Fig. 2 will display the "Create a filter" screen as shown in Fig. 3.
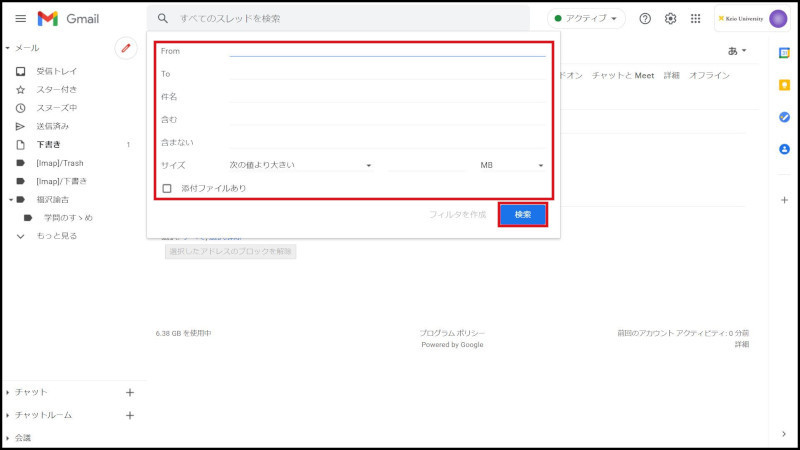
Fig. 3 Create a filter screen
In the screen in Fig. 3, enter the criteria (filters) for the emails you want to be sorted automatically. For example, is you want all emails from "user@example.com" to be starred, you would enter "user@example.com" in the "From" section. Or, if you want to attach a specific label to emails that contain the phrase "Sales Dept. 1" in their subject, you would enter "Sales Dept. 1" in the "Subject" section. You can also create filters that use multiple criteria.
Clicking "Test Search" in the middle of the screen will display all emails that match the filter criteria from emails you have already received. This allows you to check that the filter criteria you set yourself are working.
Entering filter criteria and clicking "Preparing a filter under this search condition" will display the "Create action" screen as shown in Fig. 4.
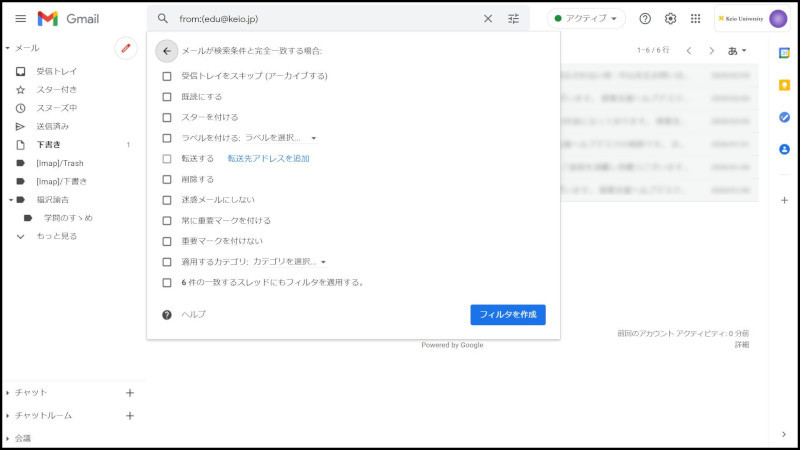
Fig. 4 Selecting the action for the filtered email
You can choose from the following actions.
-
Skip the Inbox (Archive it)
-
Mark as read
-
Star it
-
Apply the label
-
Forward it to:
-
Delete it
-
Do not treat as spam
-
Always mark as important
-
Do not mark as important
-
Category that is applied
Select the action you wish to be taken from these choices. You can also set multiple actions for a single filter. Finally, clicking the "Create Filter" button will apply this filter to emails you receive, and allow them to be automatically sorted.
Checking "Also apply filter to XX conversations below" when you create the filter will apply it to existing emails that match the criteria.
(Setting Example) How to forward emails using filters
This will explain how to forward emails that arrive at Google Workspace(formerly G Suite) Gmail addresses by using the email filter function.
First, click "Create a New Filter" in the same way as in Fig. 1,2 to move to the "Create a filter" screen.*1
Here, enter an asterisk (half-byte) in the "From:" section of the filter criteria. (Fig. 5) By entering this, you can target all senders.
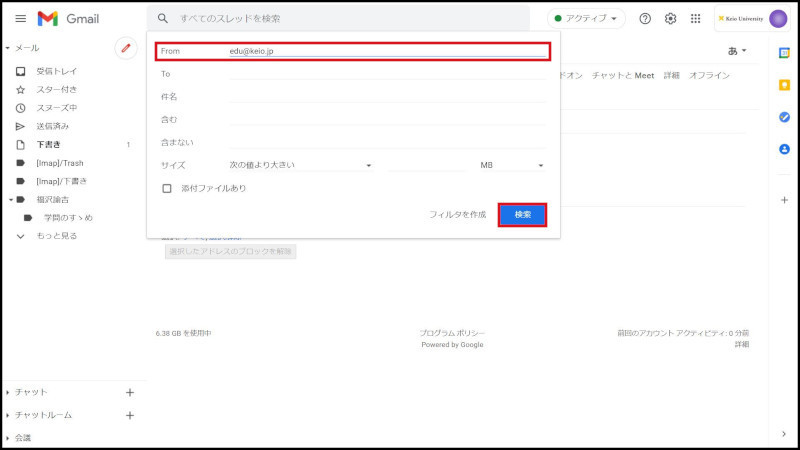
Fig. 5 Targeting all senders
Click "この検索条件でフィルタを作成" to move to the screen for selecting the action to take for the filtered emails. Here, select "Forward it to" from the actions available and specify the forwarding email address. (Fig. 6) To add a forwarding address, refer to the steps in "Forwarding emails"
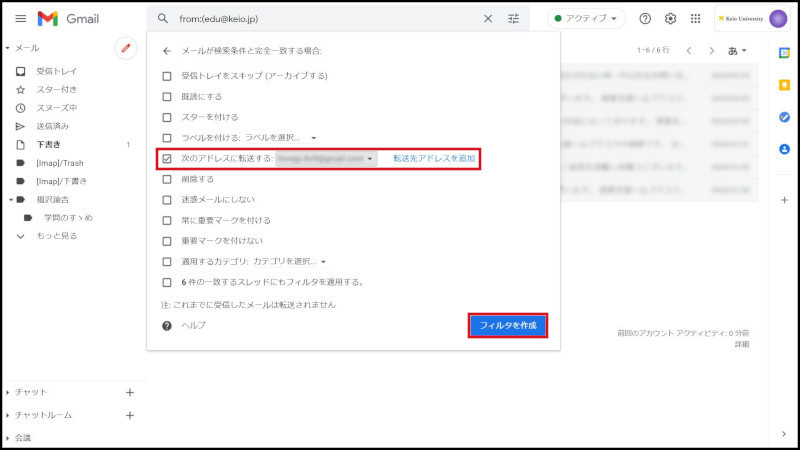
Fig. 6 Entering the forwarding email address
Clicking "Create Filter" after entering the address will mean that all new emails will be forwarded to the address you have specified.*2
1 To make "Forward it to" valid, you will need to check the forwarding email address in same way as for "Automatically forwarding emails" earlier.
2 If you want to target emails you have already received for forwarding as well, select the check box in "Also apply filter to XX conversations below"
Return to Basic Gmail operations for explanations about other features.
Last-Modified: October 27, 2021
The content ends at this position.